Introduction
It isn’t uncommon for our team to hear something like, “Oh! This is so clean and simple” from people who’ve just seen Pathwright for the first time. And if you’re reading this as a Pathwright user, you may have said something similar. Pathwright has been designed with simplicity in mind, which creates a world of opportunities (some of which we’ve never planned for). Pathwright is used in academia, by homeschool parents, in organizations of thousands, or by mentors teaching a handful of people. And today, I want to share a use case that’s often overlooked: hosting virtual events.
I’ll say out of the gate that Pathwright wasn’t designed as event software. That kind of software exists; and, like all software, comes in varying degrees of intuitiveness and effectiveness. However, Pathwright was designed for learning. And most virtual events fit within that category.
So let’s take a look at how you might use Pathwright to host a virtual event this summer. And to enliven our post, I’ll be drawing examples from our friends over at The Makers Summit who recently hosted their 2023 virtual event using Pathwright.
Before the Event
Create your Path
Before you’re able to encourage sign-ups for your event, you’ll need to create your Path. So, you may be asking, “Christian, is there a super secret special Path button I need to hit to create this elusive and magical event Path?” Nope. It’s just a path. And you’ll only need two lessons to begin inviting people and promoting the event.
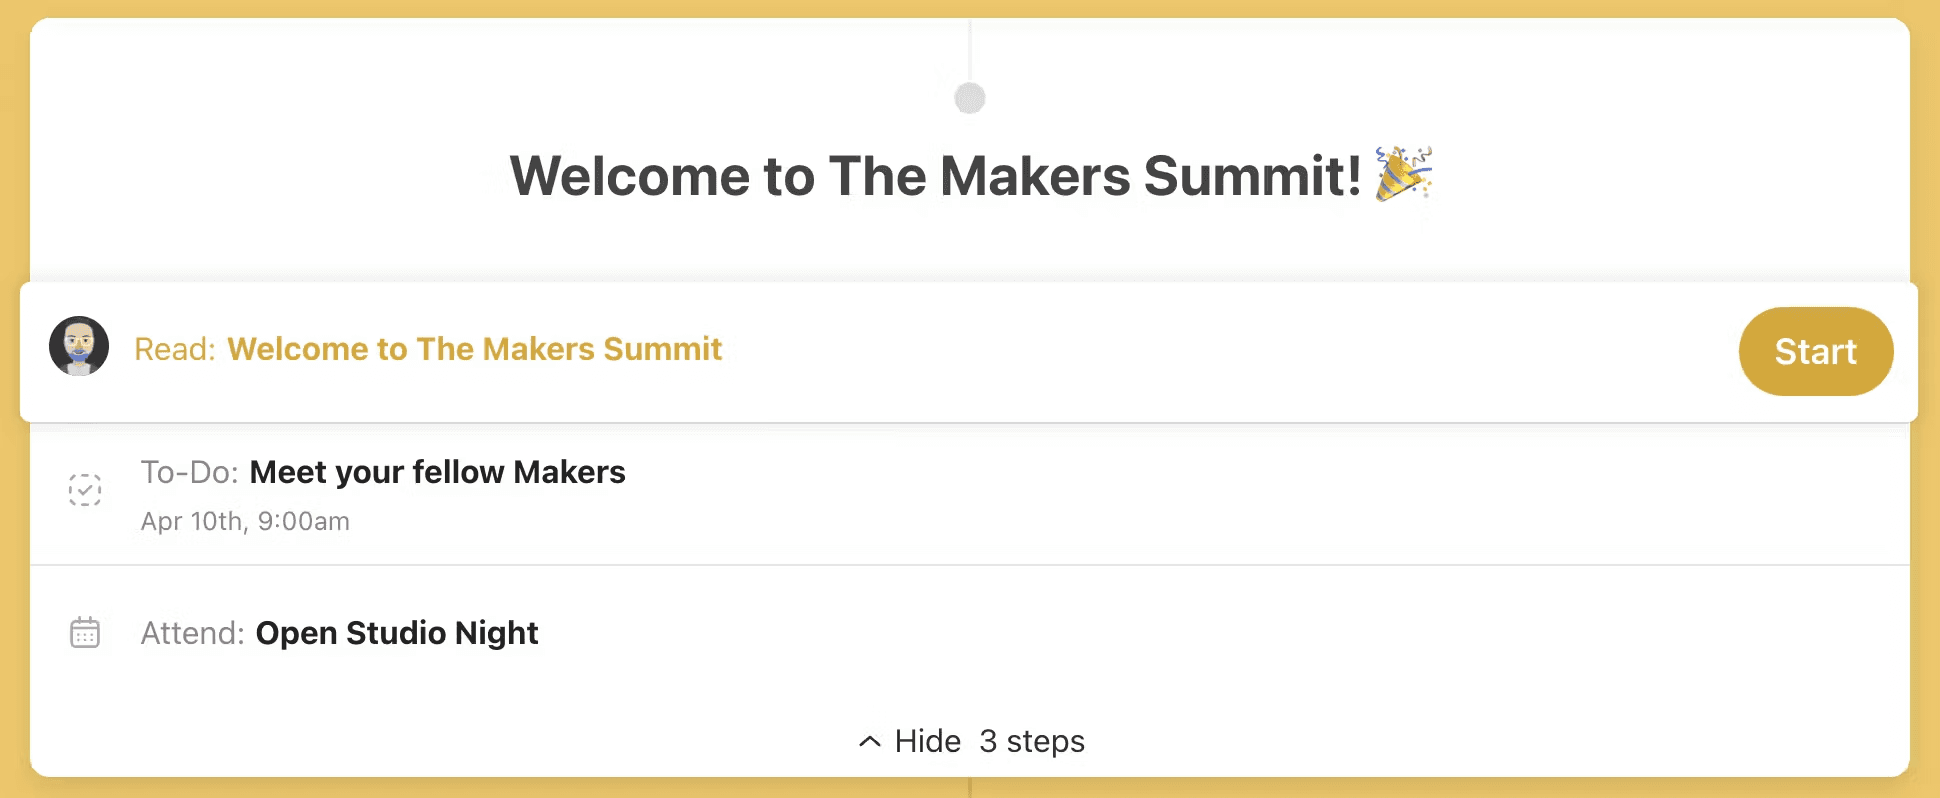
First, create a “Welcome to [Your Event Title]” lesson. This lesson will be important in pre-event communication to help your attendees feel comfortable, confident, and excited. We’ll discuss this more later in this post.
Second, you’ll need to create a lesson to act as your event itinerary. Keep this lesson simple. Ideally, you’ll have one step to correspond with each session at your event.
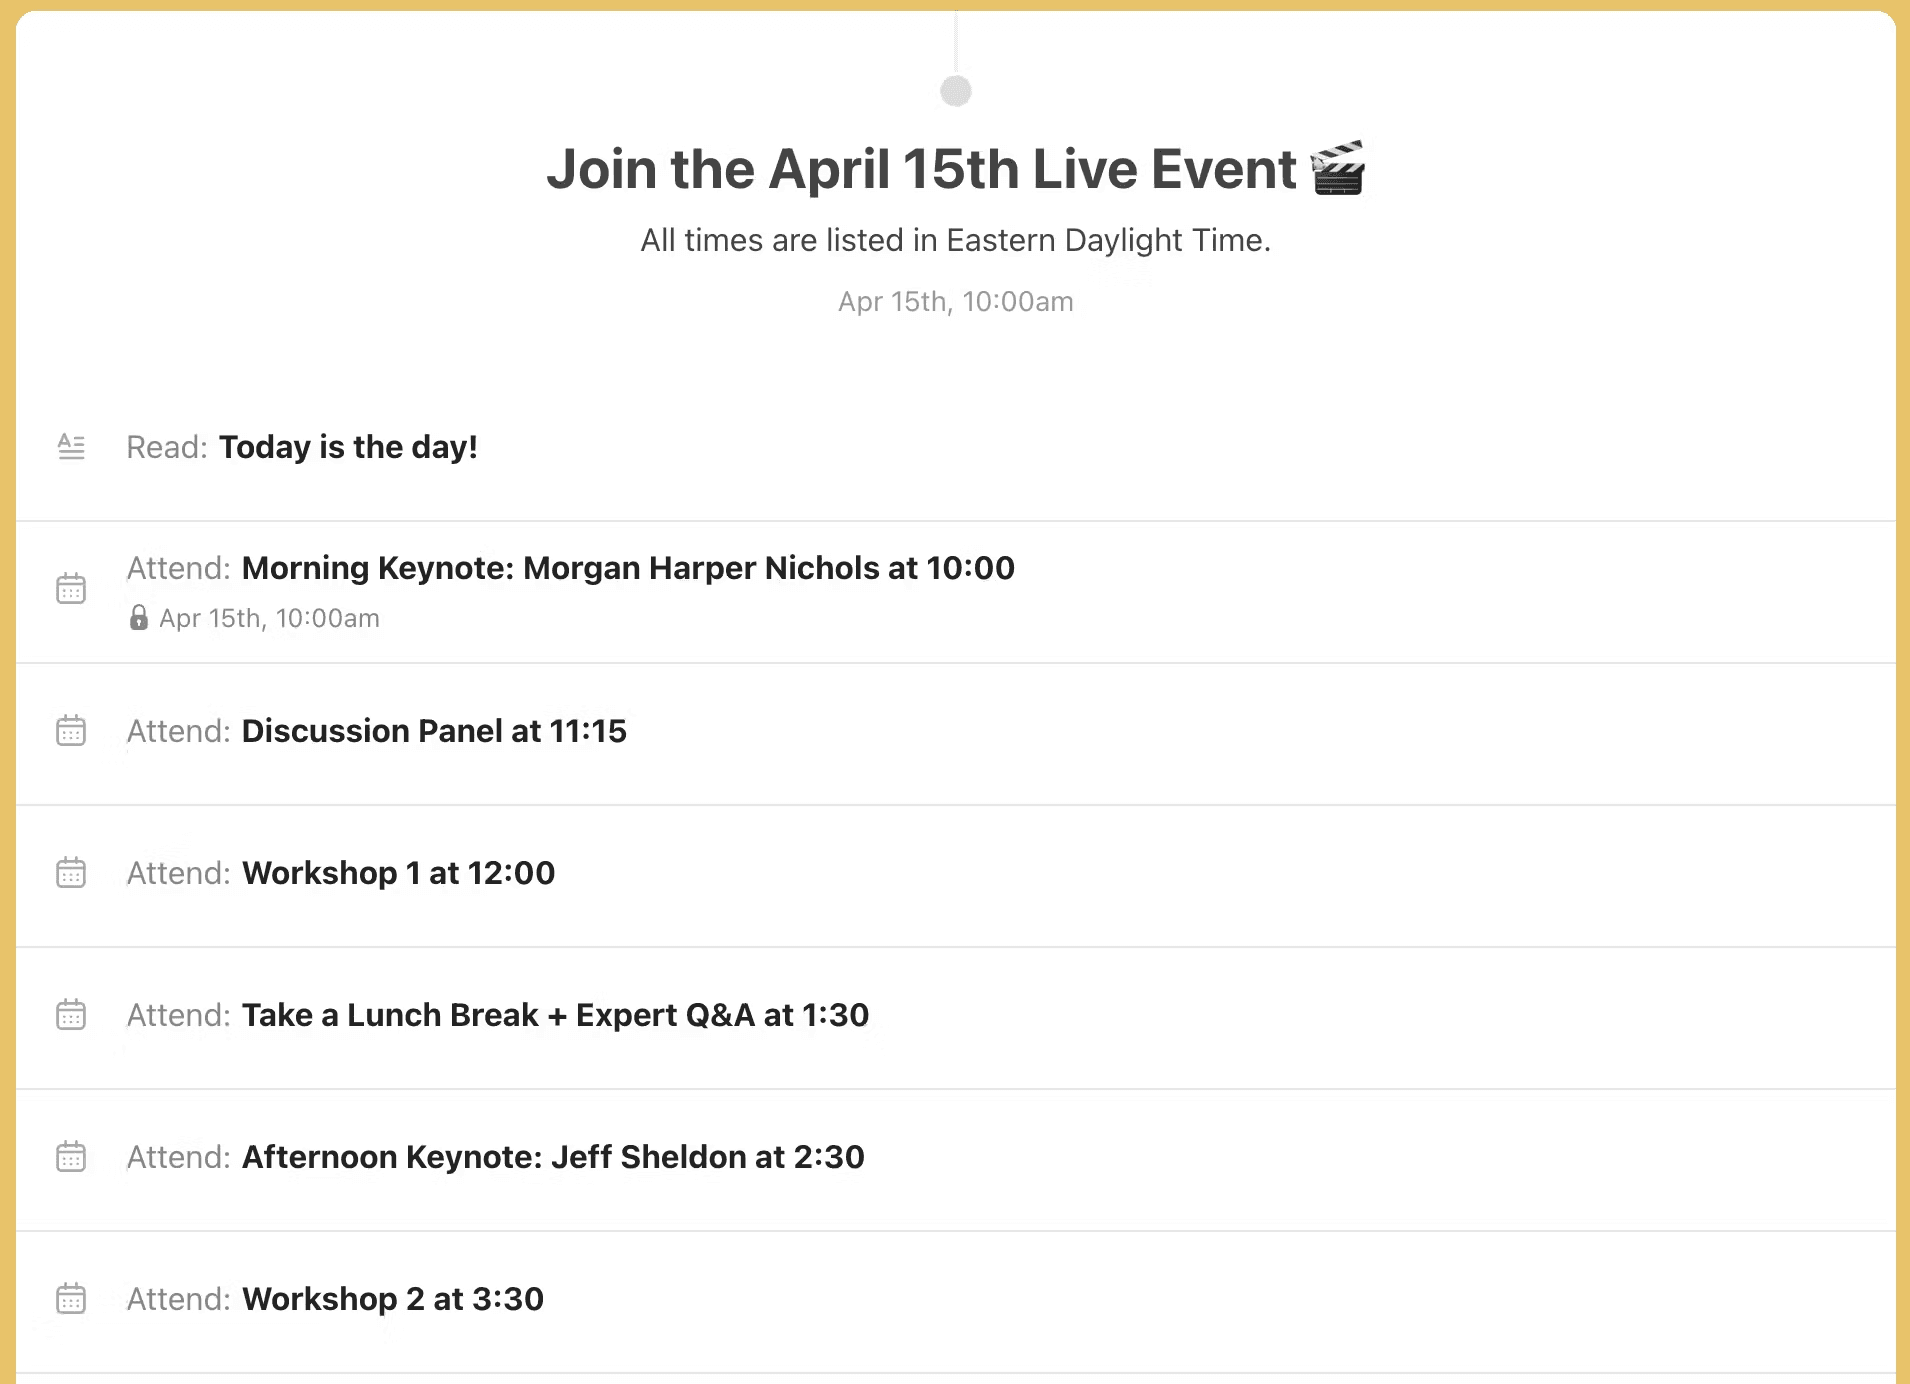
You don’t need to add real content to all of these steps before you begin taking registration (though you will need sample content—any ol’ block will work—in order to publish these steps).
However, I’ll pause to give you two strong encouragements. While you don’t need real content in ALL of these steps, I strongly encourage you to go ahead and build your “Welcome” lesson before you begin taking registrations.
Second, don’t forget to add “Start Dates” with a lock to your itinerary lesson. This serves two purposes. First, it ensures attendees won’t rush ahead and complete steps before they should. Second, it will keep people from seeing steps that only contain sample content, saving yourself from embarrassment (I may be speaking from experience here).
Consider your marketing and registration flow
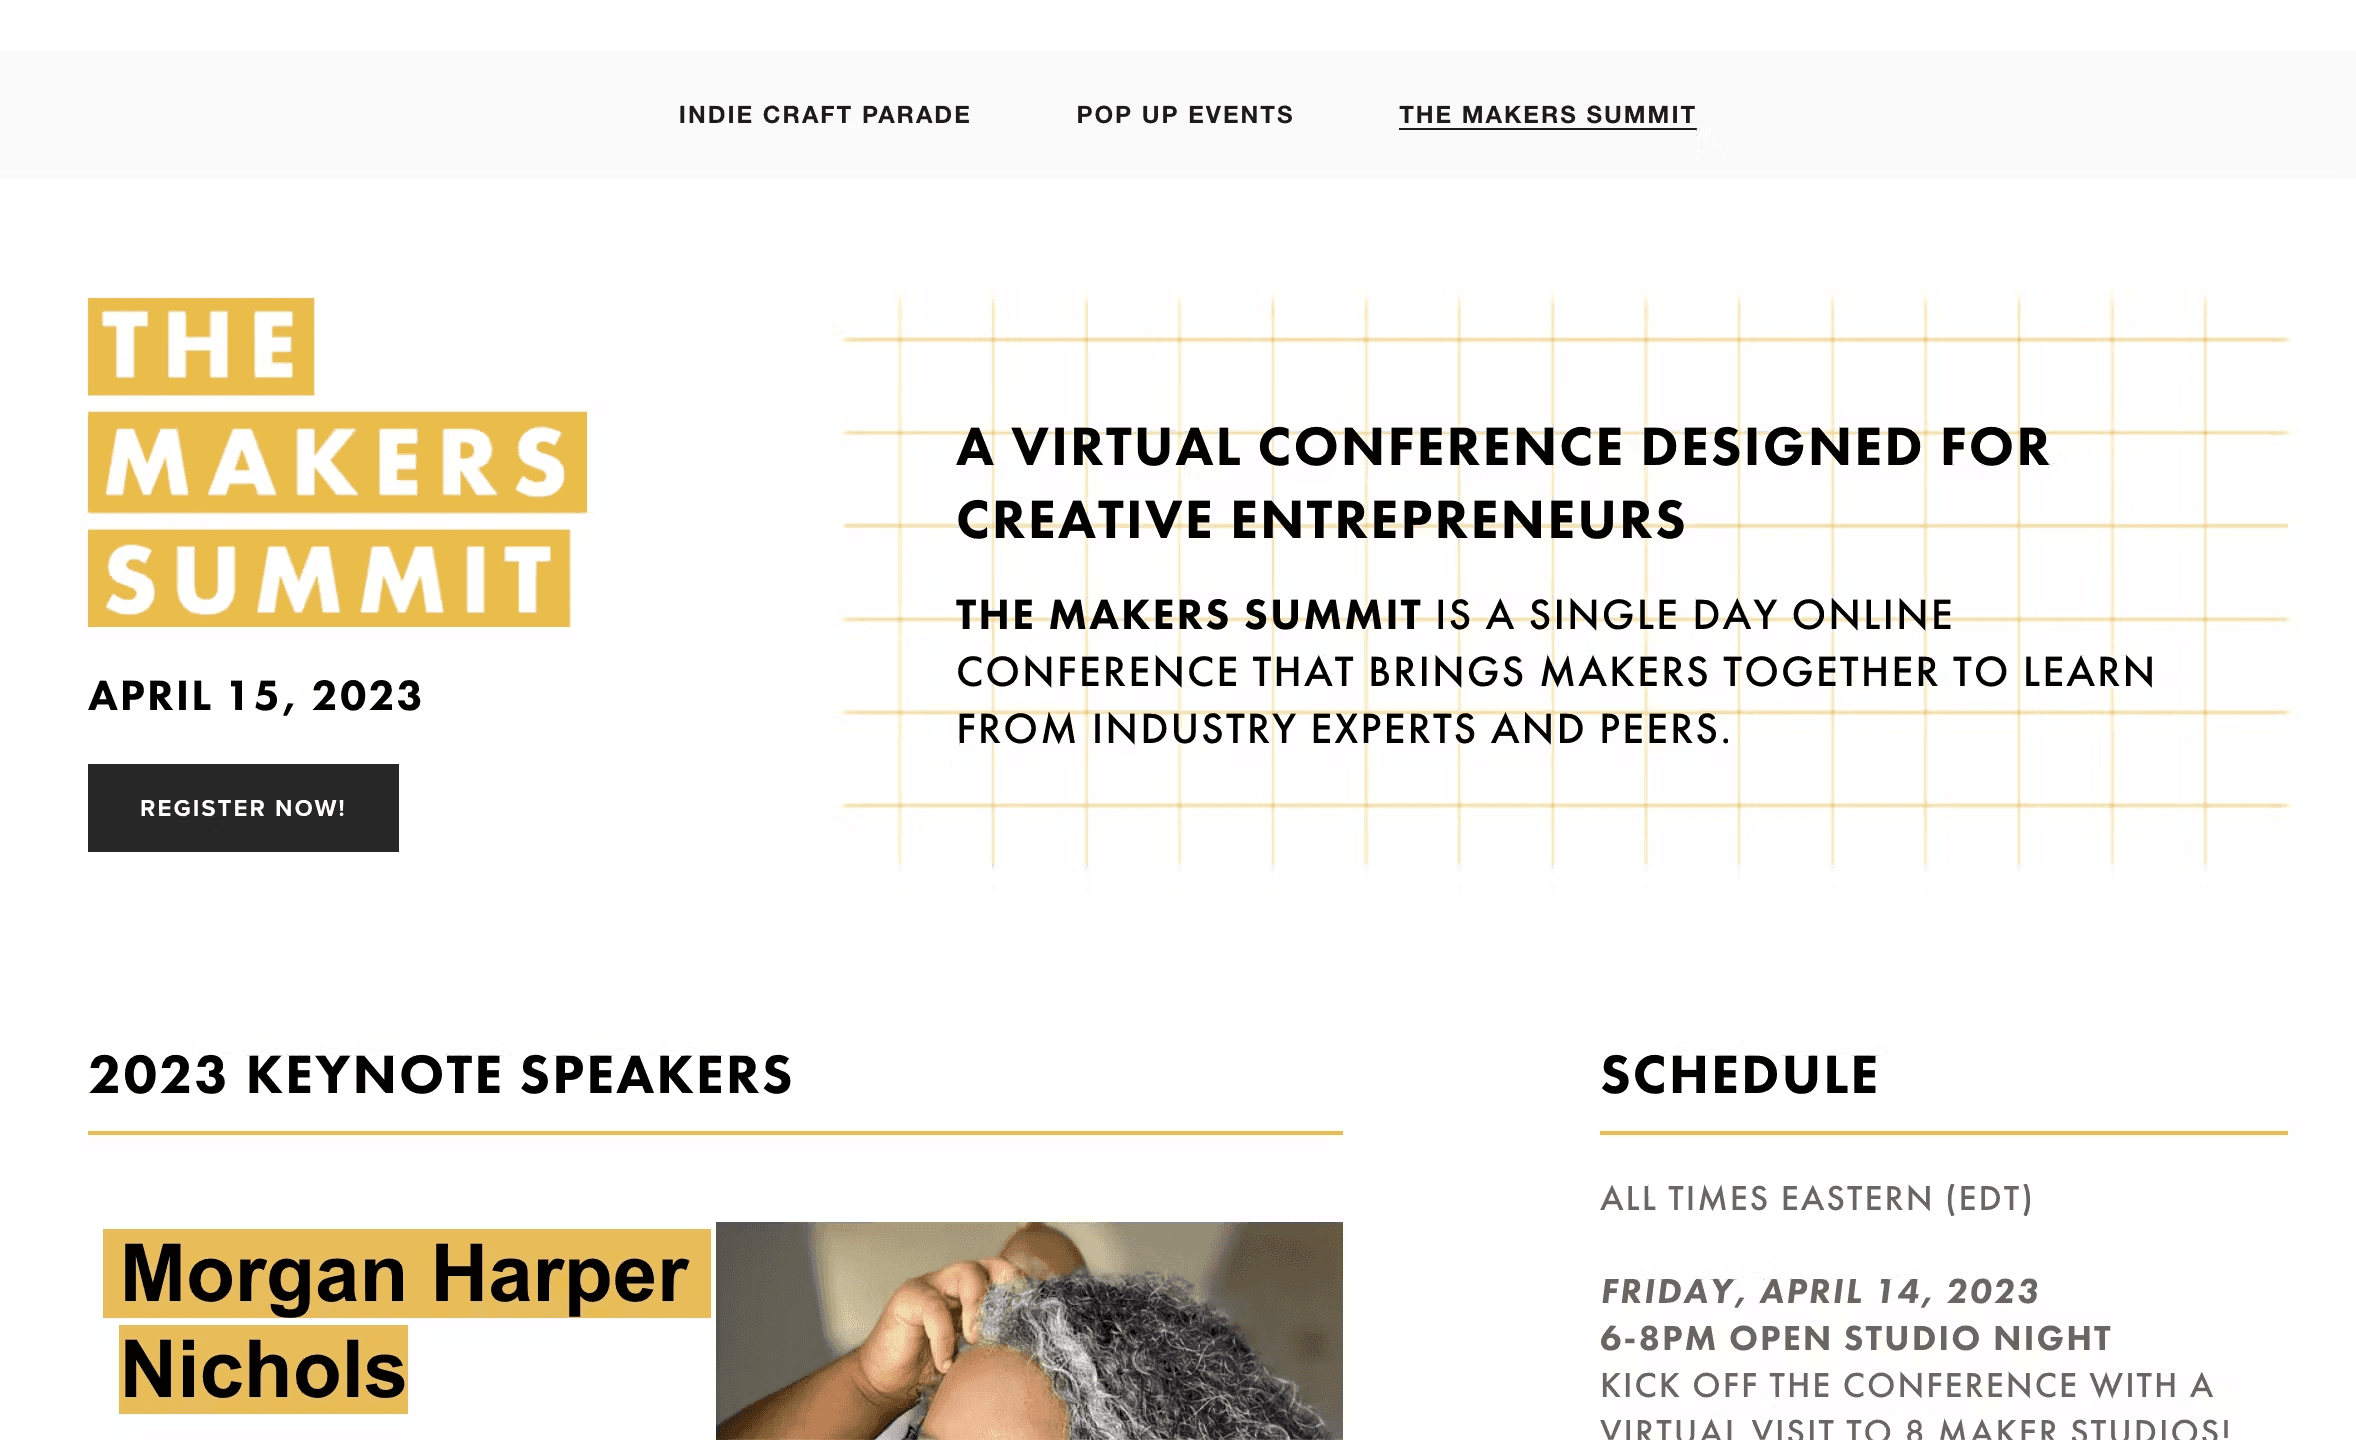
There are two ways to market your event, however, both rely on Pathwright for registration and payment (which is why we needed to make our Path first!). In the first way, you’ll create your own landing page for your event. In the case of The Makers Summit, they created a beautiful website with the purpose of marketing the event and giving attendees a look at the schedule and a chance to get to know the speakers.
If you have a “Register Now” button, similar to the one on The Makers Summit site below, you can attach a private invite link to the Path. That means when potential participants click that button, they are prompted to create an account and pay through Pathwright. Then attendees had the chance to take the lovely “Welcome” lesson previewed above.
When sending marketing messages to their existing email list, The Makers Summit also used that same private invite link so people were prompted to pay and register. They even took advantage of the discount code system in Pathwright to offer free or discounted courses to early registrants.
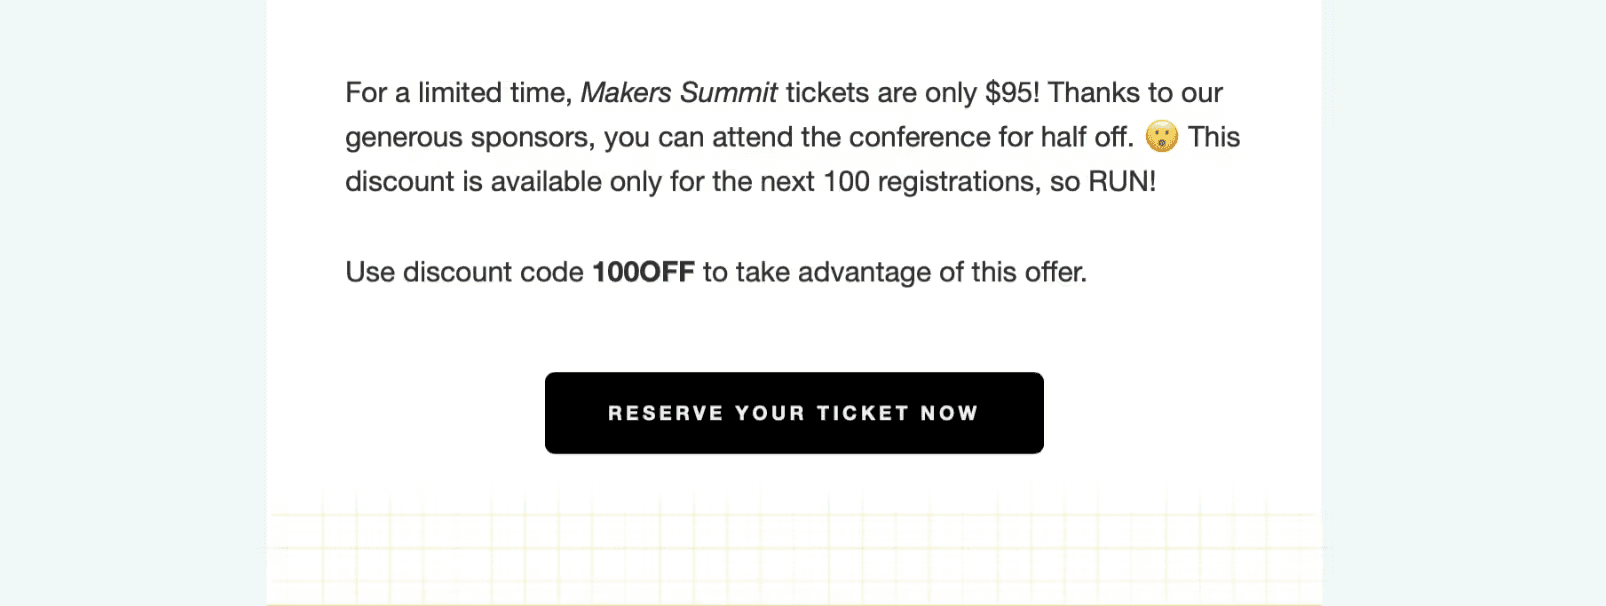
While the method of marketing and registration The Makers Summit used is super effective, it works particularly well for organizations that have existing email lists and time to build beautiful websites. If that’s not you, you may opt for the second approach. In this approach, you’ll use the About pages built into Pathwright to market your event and take registrations. The only change you’ll make is having a public instead of a private cohort.
Ground your attendees
Now let’s return to the content within our pre-event “Welcome” lesson. The first goal of our “Welcome” lesson is to ground our attendees in what they’ll experience at the event and when and to give them an opportunity to ask relevant questions.
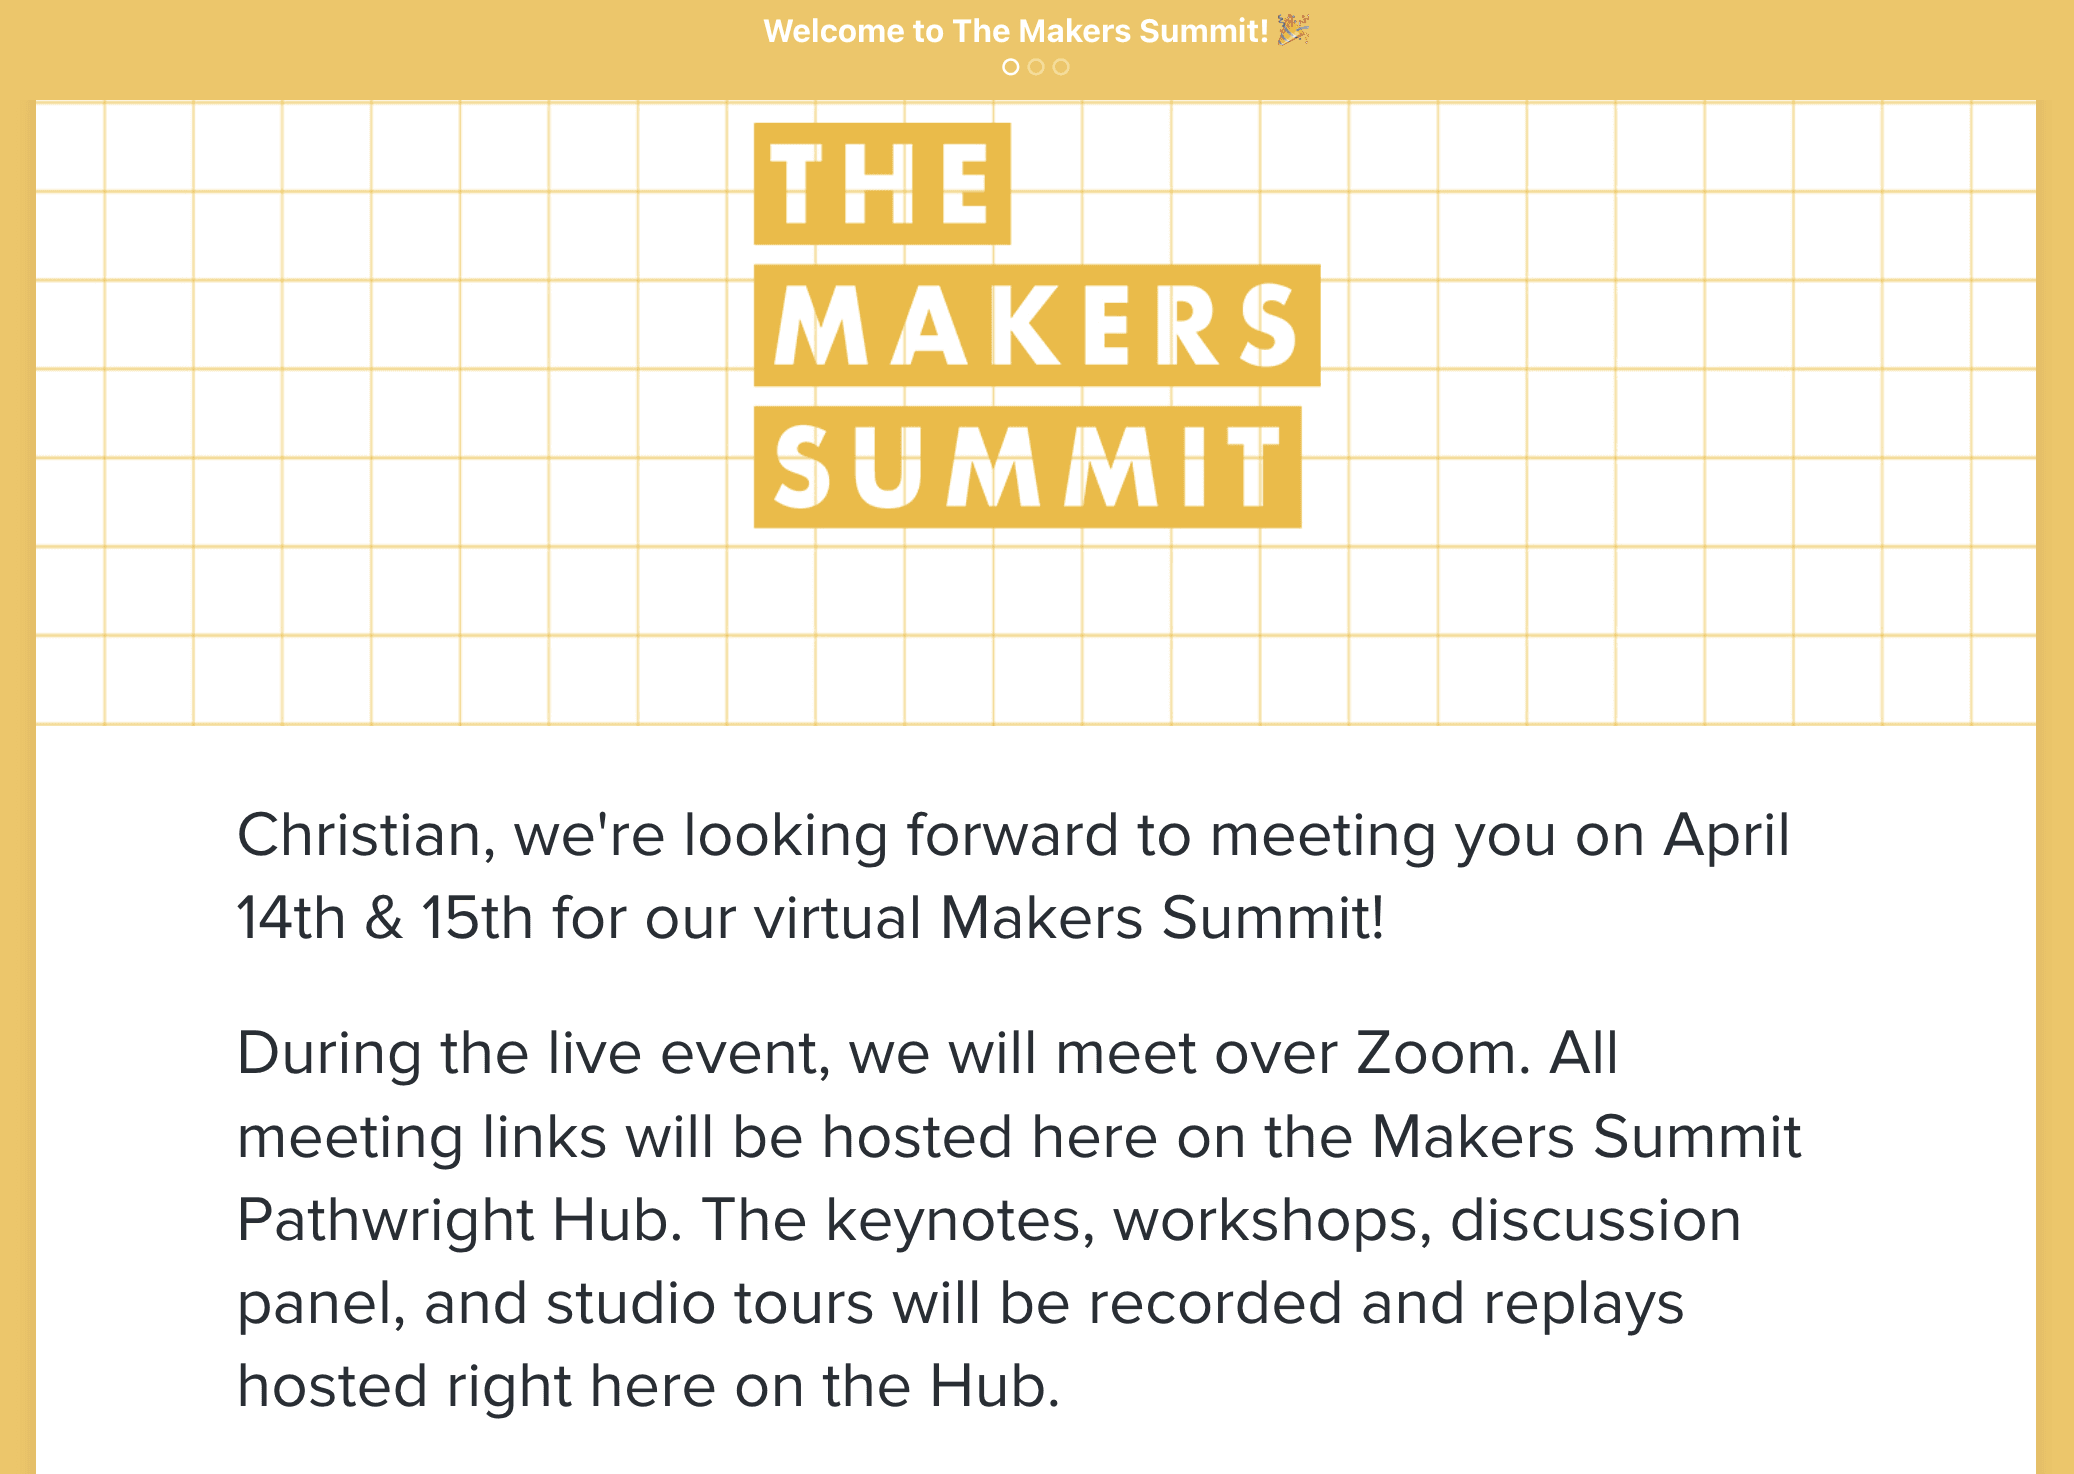
In the case of The Makers Summit, they began with this personalized introduction for all attendees. You’ll notice that they referred to the Path as “The Makers Summit Hub.” I really like that language as it encourages your attendees to view the platform in a great way: as a basecamp of sorts that they’ll return to when they need information and community.
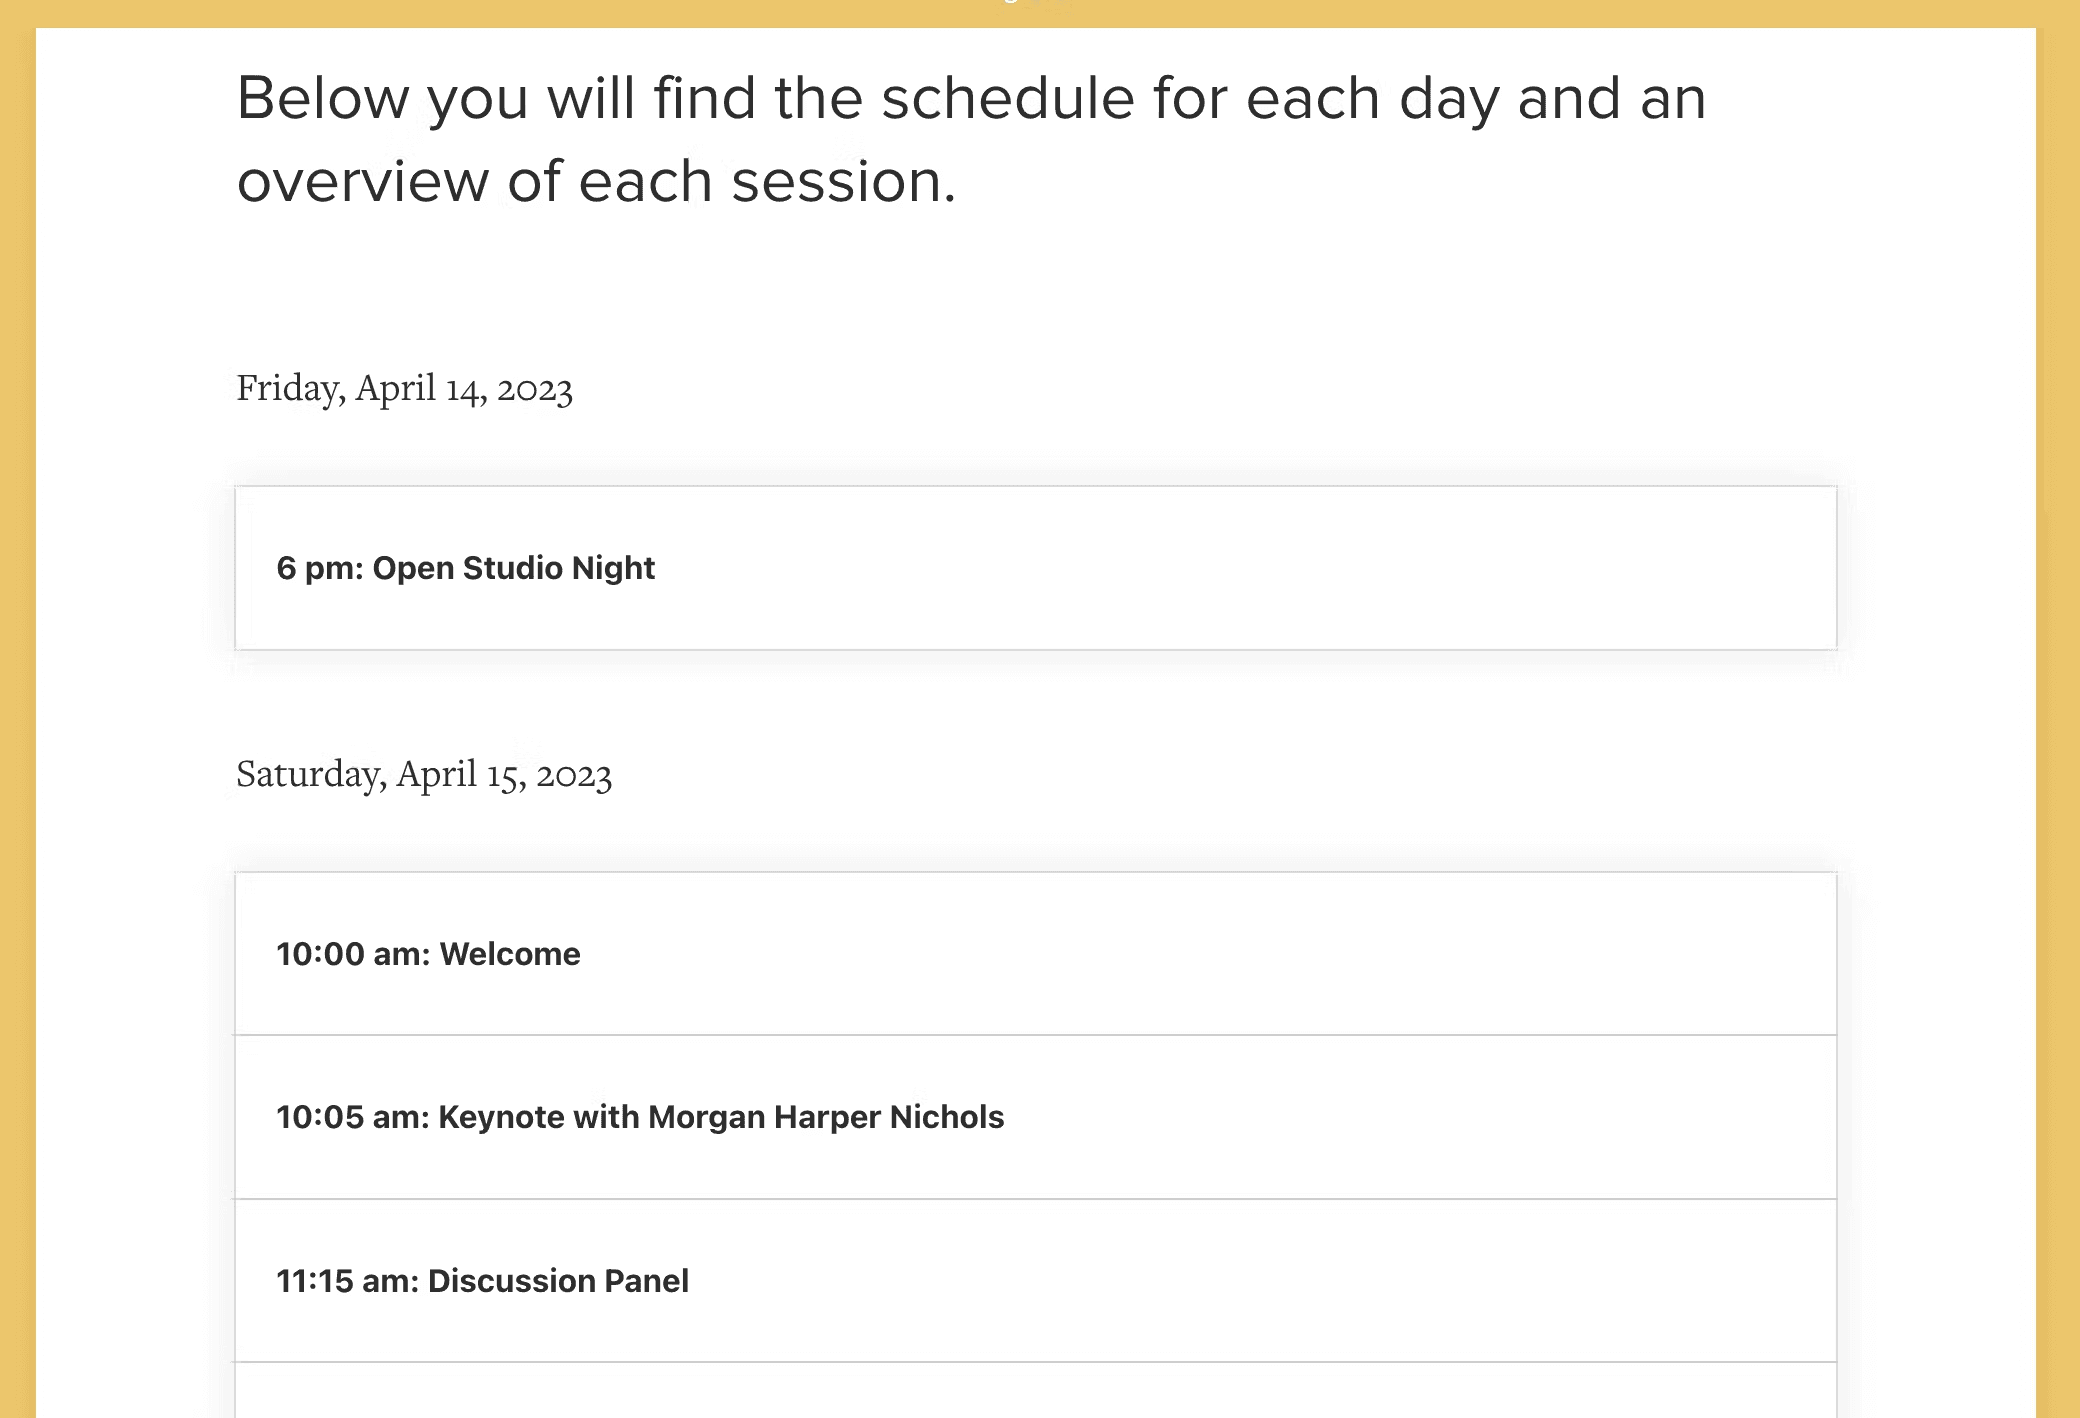
Next, The Makers Summit used the Pathwright accordion block to provide a scannable, interactive agenda for attendees to preview the entirety of the event. So while the Path itself acts as a pretty good itinerary of sorts, this step provides an extra level of comfort for those attendees who really want to know what to expect.
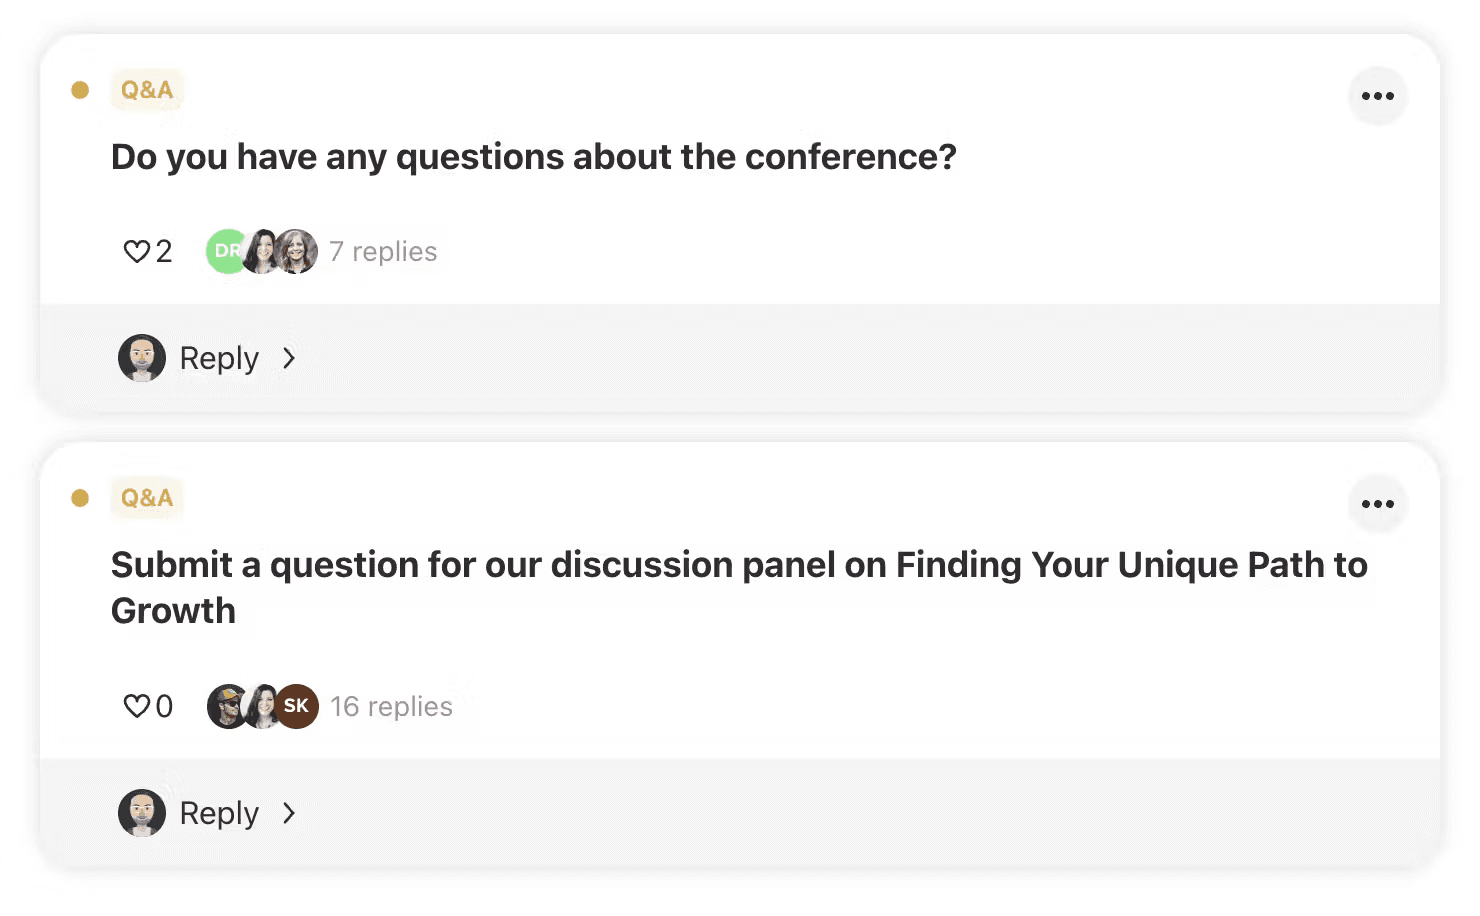
Finally, The Makers Summit used Pathwright discussion prompts to give learners a chance to ask questions about conference details and to supply potential questions for upcoming sessions.
Encourage community before the event
One major selling point for any virtual event is getting to meet like-minded people from around the world with relative ease. To make sure your learners don’t go into the event alone, it’s a fantastic idea to use your “Welcome” lesson for introductions.
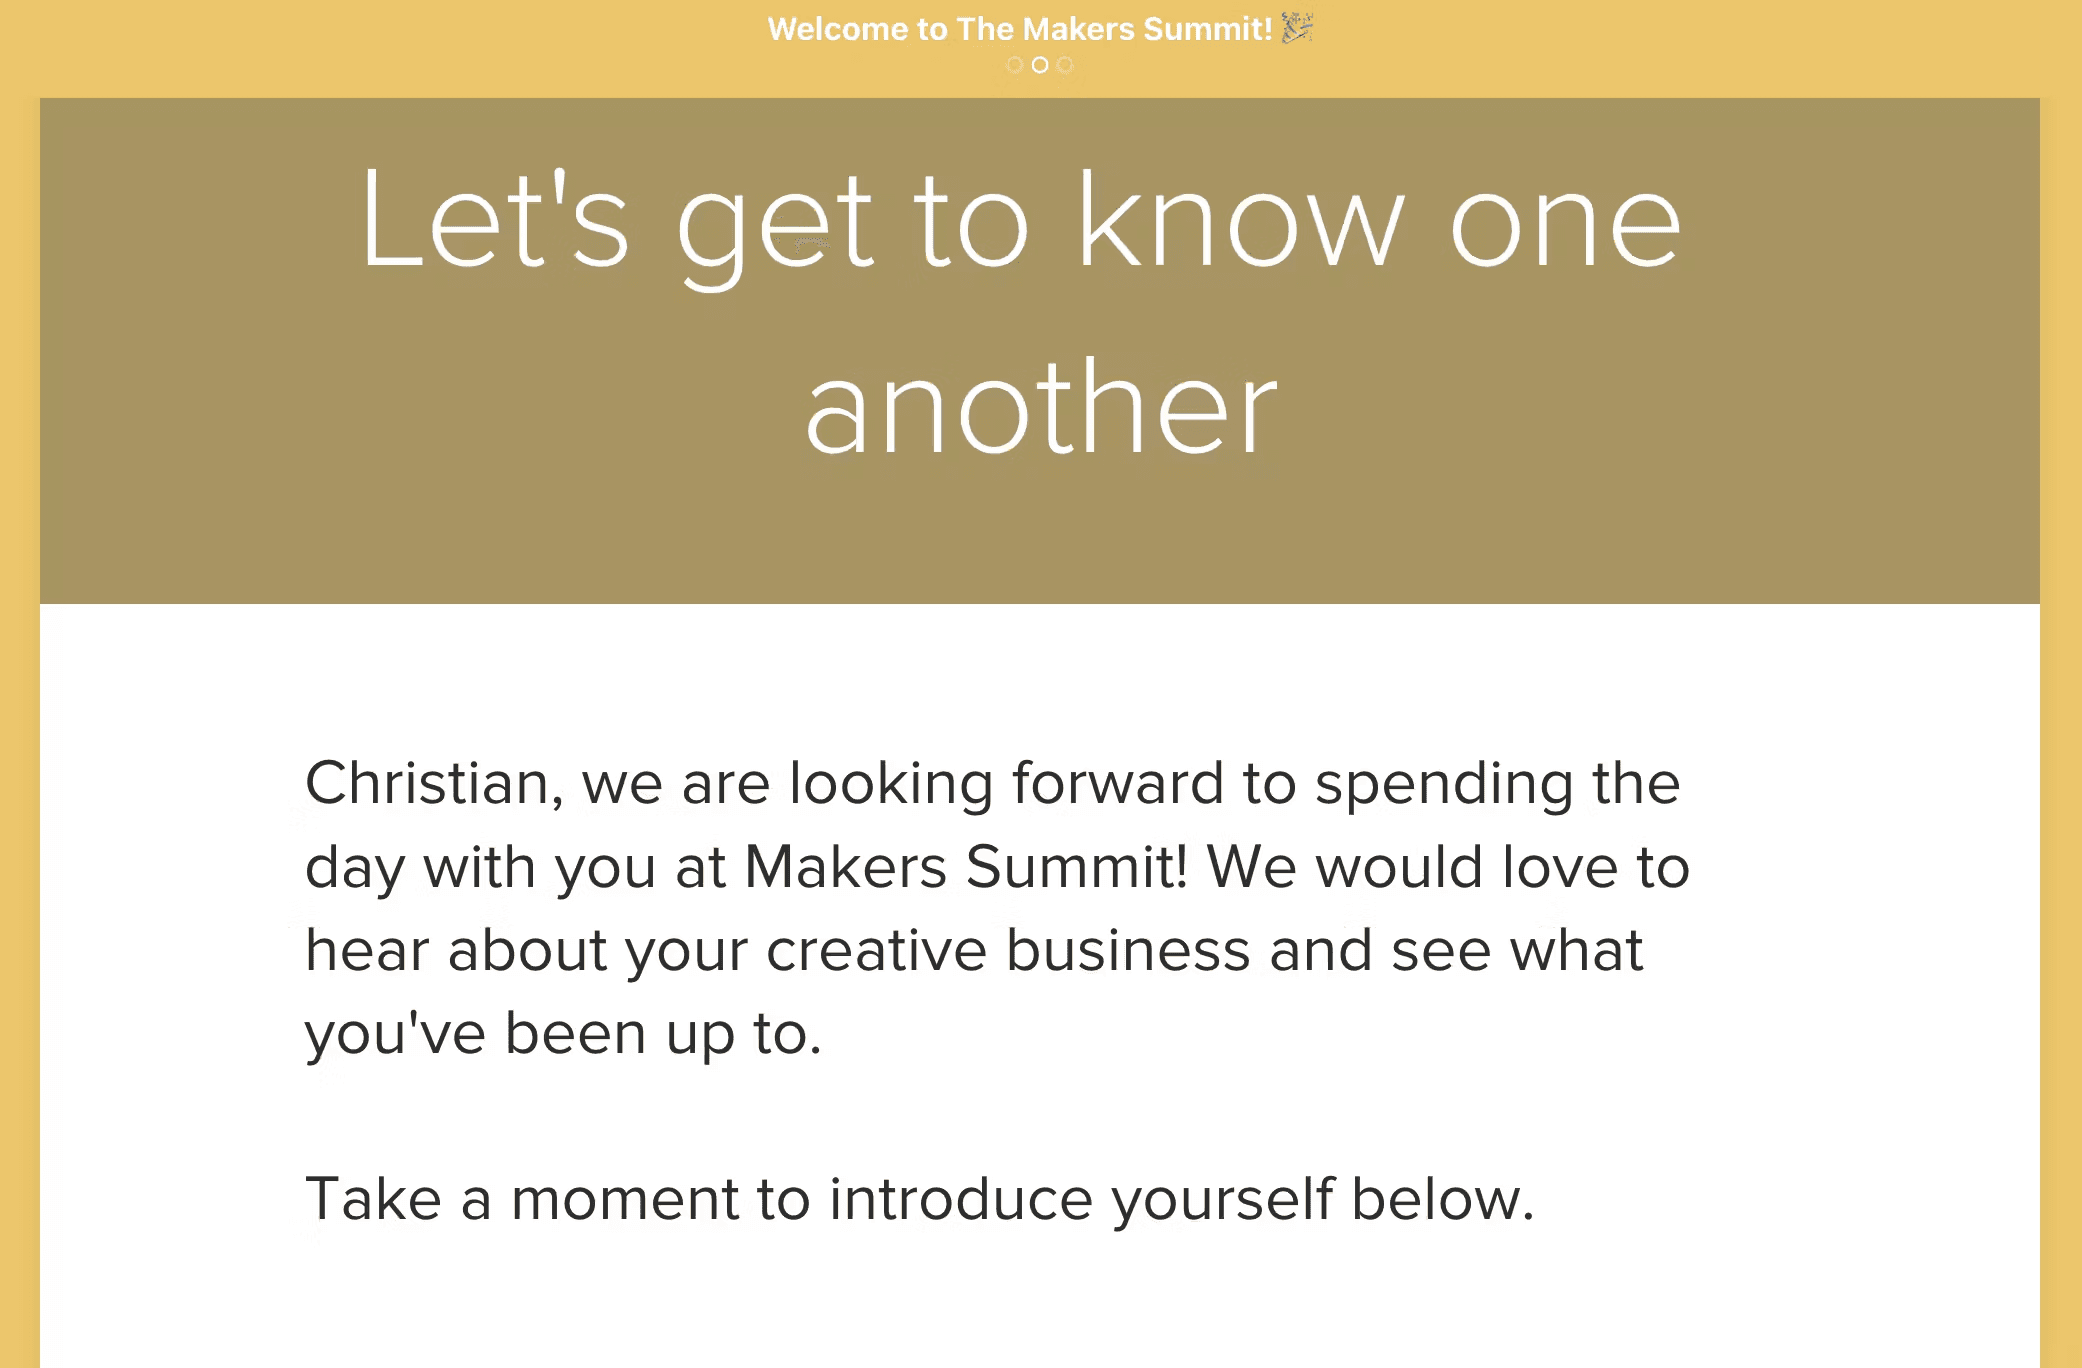
I’ve seen this done in a number of ways, from live, real-time discussion in a Pathwright discussion prompt to sharing video introductions.
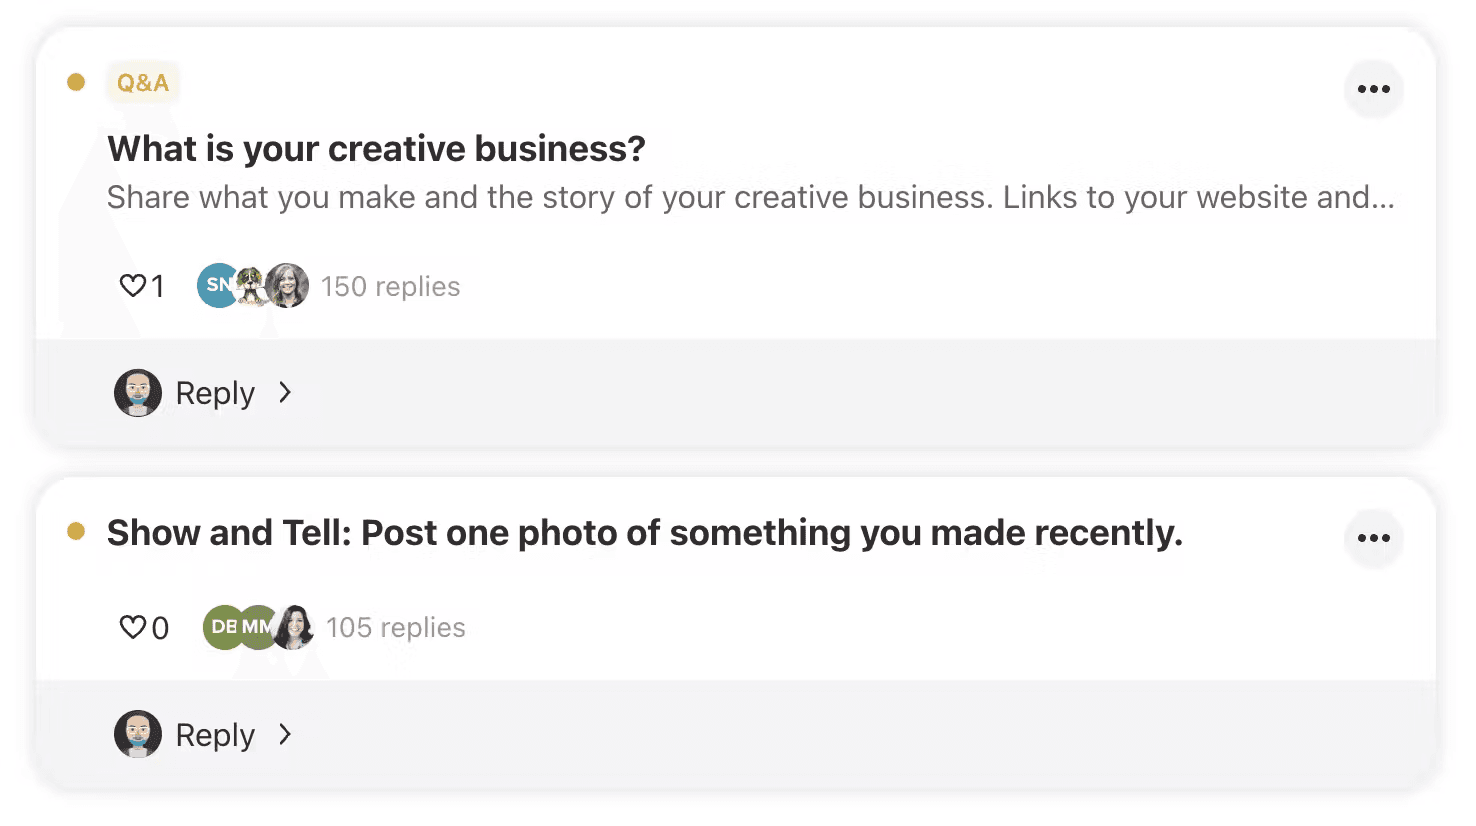
While any of these methods work reasonably well, The Makers Summit leaned into the spirit of their event and had attendees share what their creative business is and a photo of something they’d made recently. Since Pathwright discussion prompts are a multi-media experience, the posts quickly filled up with over a hundred replies showcasing the work of the attendees.
With learners grounded and connected, The Makers Summit team was ready to use Pathwright for their main event.
During the Event
Ensure attendees know where to go first
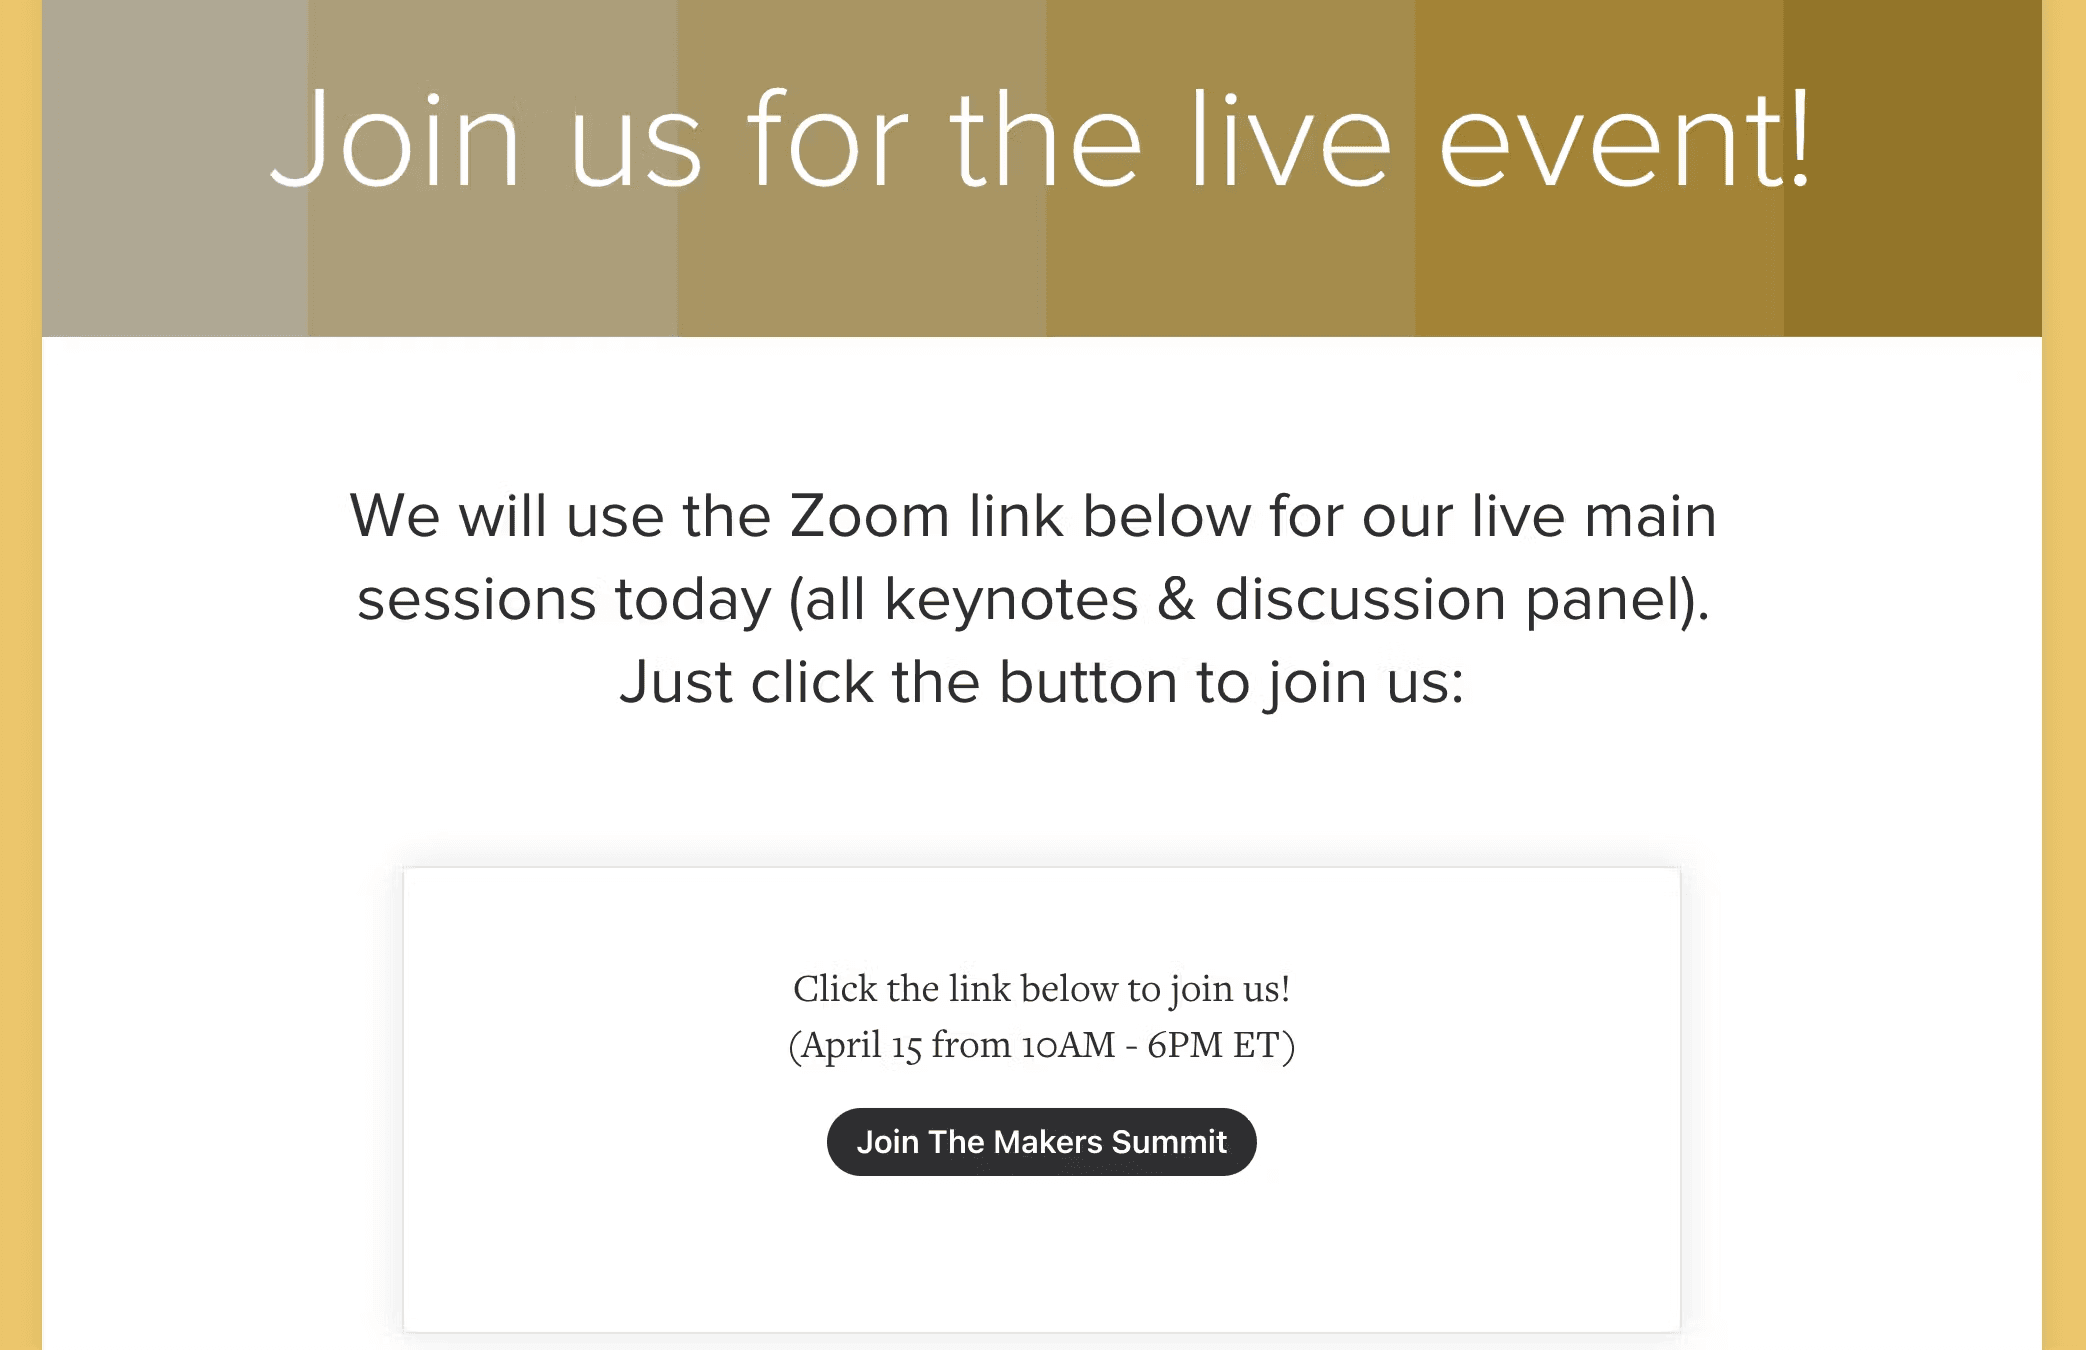
With the main event at hand, you want to ensure that all learners know precisely where to go. And that place is very likely the right Zoom link (or whatever video hosting service you use). The Path is a great way to ensure people find the link. The Makers Summit created a simple step with the link right at the top. And to make things simple, they used the same link for all their main sessions. I highly encourage you to do the same!
Generally, we’ve found that sending 2 to 3 reminders prior to the first session of your event ensures the greatest involvement from the group. I typically send a reminder 24 hours before, 1 to 2 hours before, and 15 minutes before. I know that seems like a lot, so feel free to dial it in to what works for your crew.
While it’s easy to set these reminders up in Pathwright, directing attendees to the right step with the link they need, you may consider sending a more generic email to your attendee list using another method. This can be especially helpful if, for instance, you haven’t required your speakers to register for the Path you’ve set up or if you have special guest attendees joining.
And if you do expect people to join the event who may not have registered in the normal way, we recommend pausing for a minute or two at the start of your first session and encouraging all attendees to bring up the event Path so they can follow along with the day.
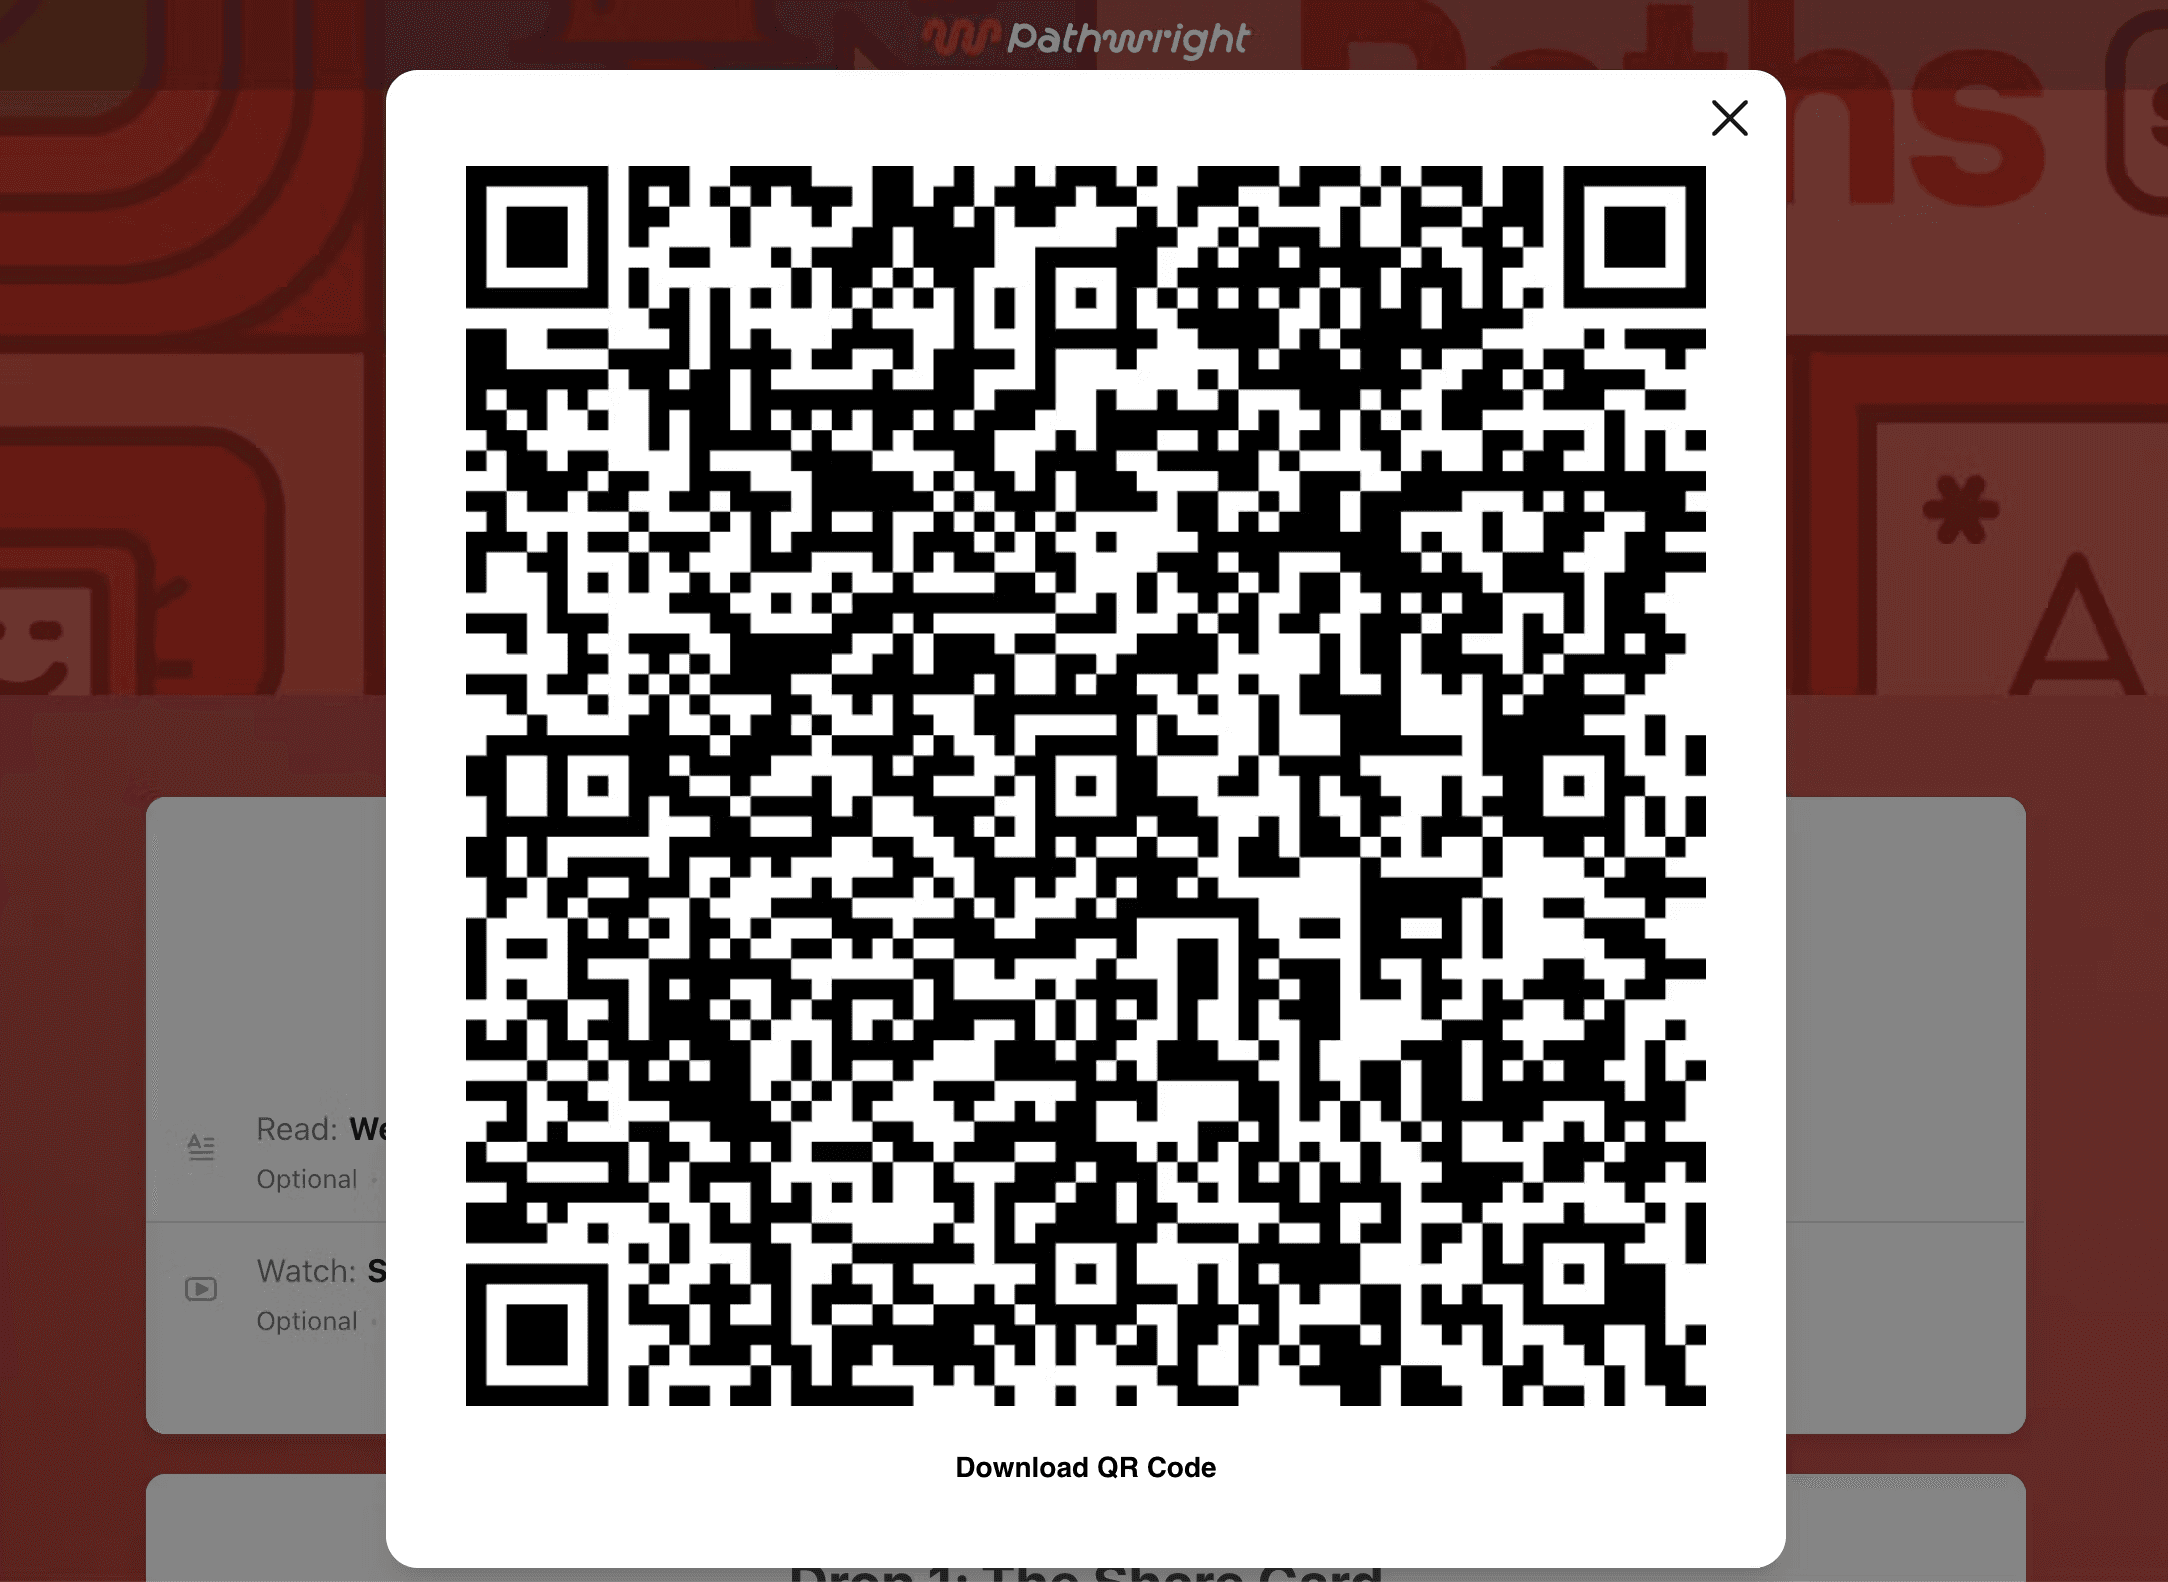
One simple way to have attendees join easily is to share the QR code for your Path on screen. Here’s an example of what that would look like.
Use your Path as an itinerary for the rest of the day
With all participants (guests and speakers included) in the path, everyone can use it as an itinerary for the day. We recommend taking a moment during your introductory session to show people how to navigate. Seeing how easy it is to unfold the agenda lesson and click into a step will give everyone comfort that they won’t get lost during the day.
And for each step associated with a session, we recommend a simple, effective layout of speaker photo, bio or session description, and link. This format makes each step easily scannable and actionable for attendees.
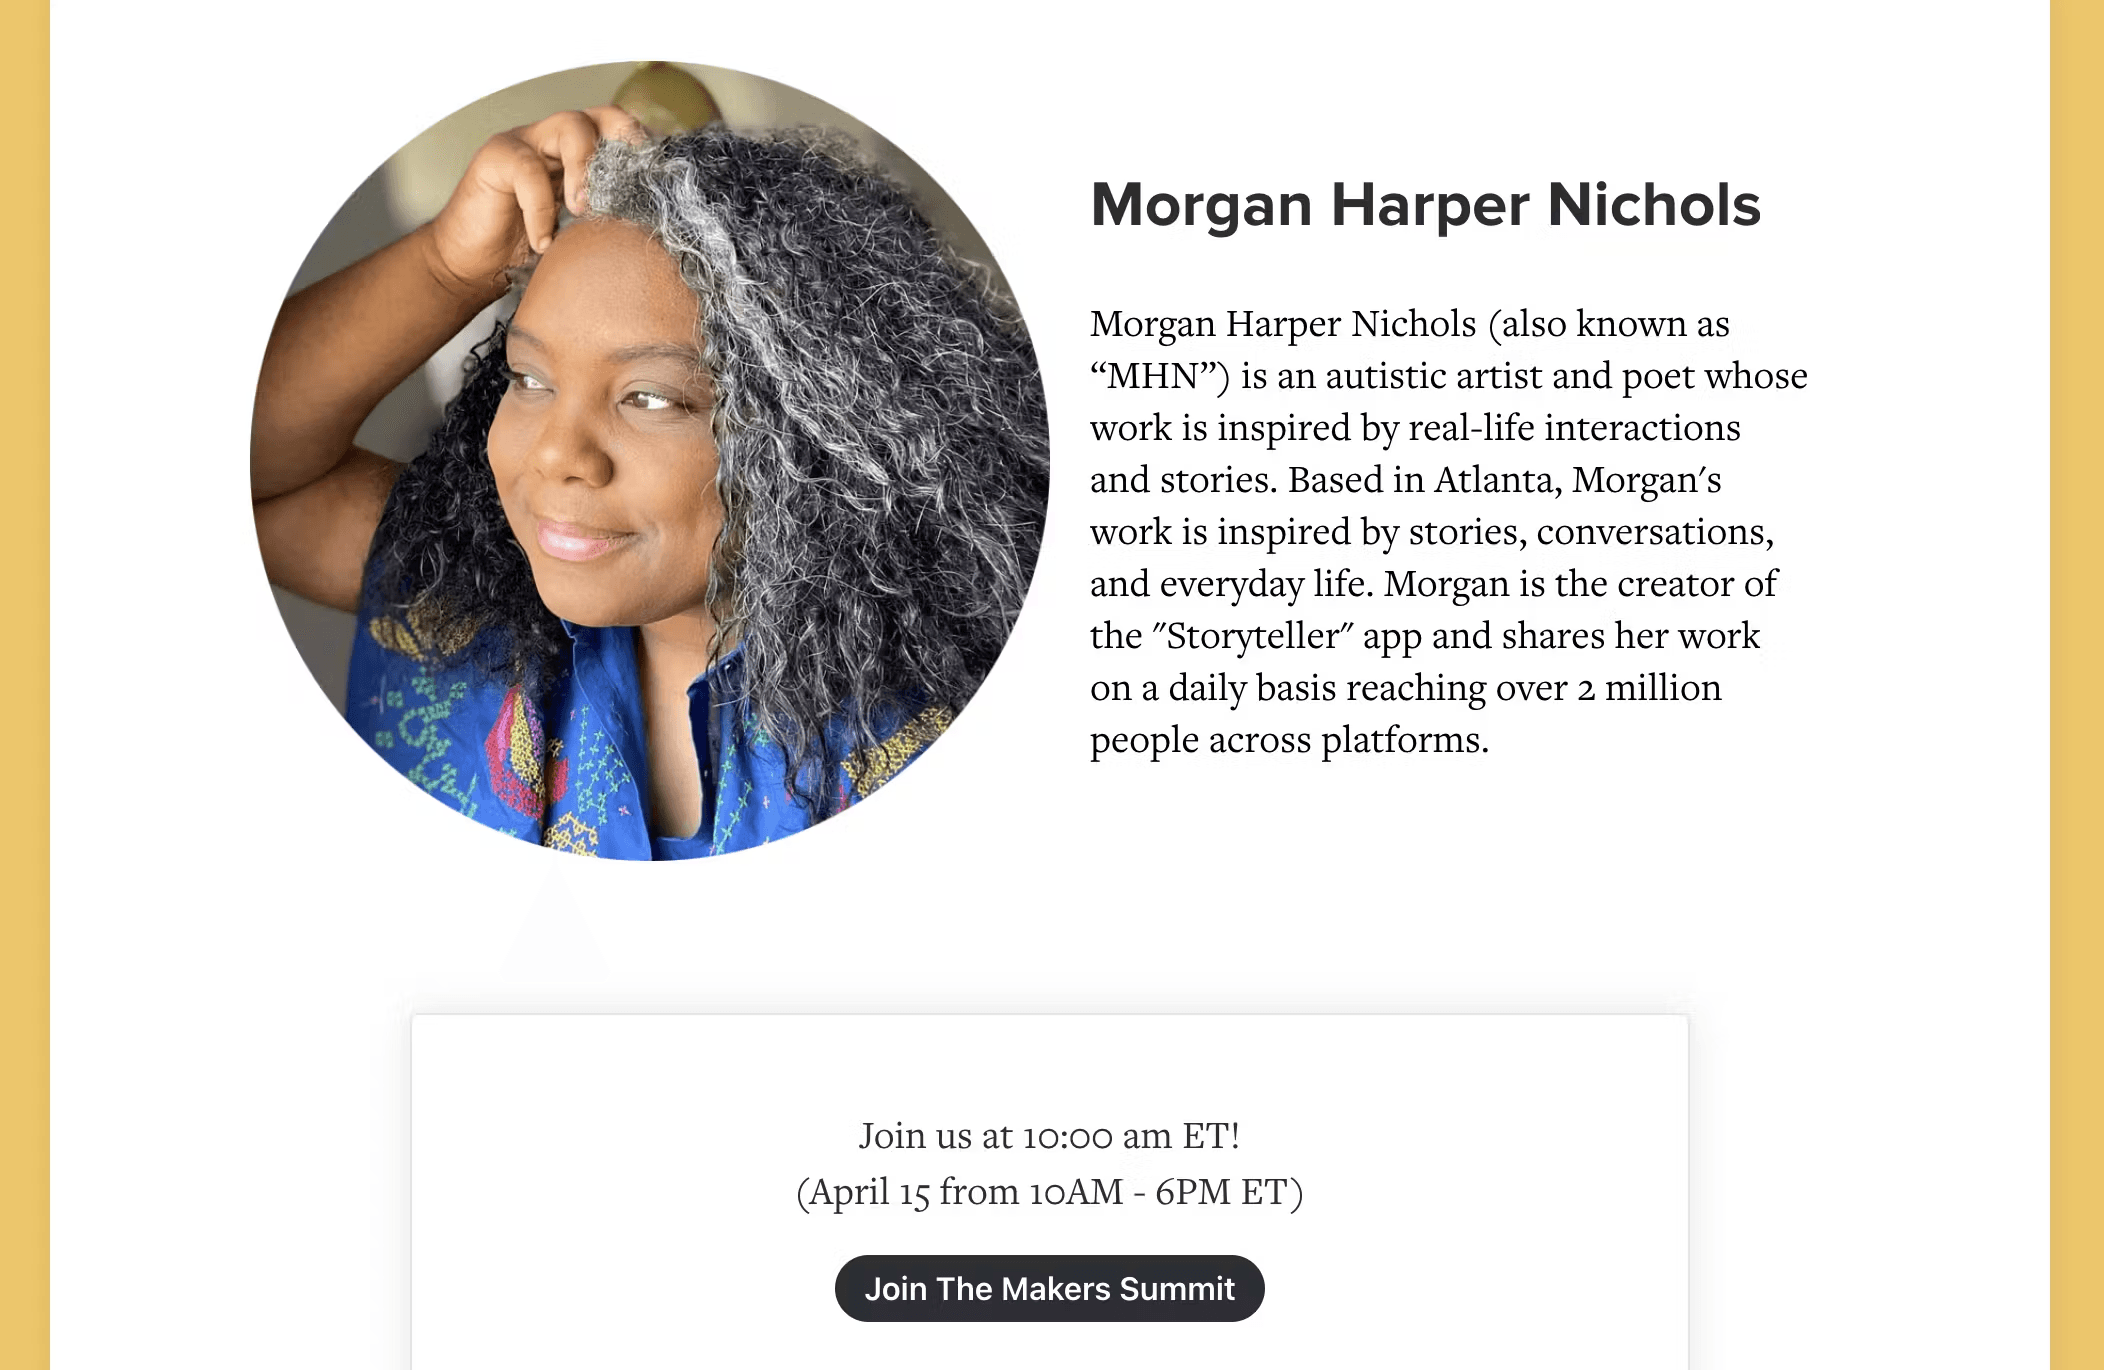
For sessions where your learner has some optionality, creating a simple step with those options is key. Here’s how The Makers Summit handled their workshop sessions in which learners could choose between multiple options.
First, you’ll notice two workshop steps interspersed among other sessions and breaks.

Within each of these steps The Makers Summit included all the options for concurrent sessions an attendee may choose. Again, The Makers Summit team followed the simple, effective pattern of session description and link for each option.
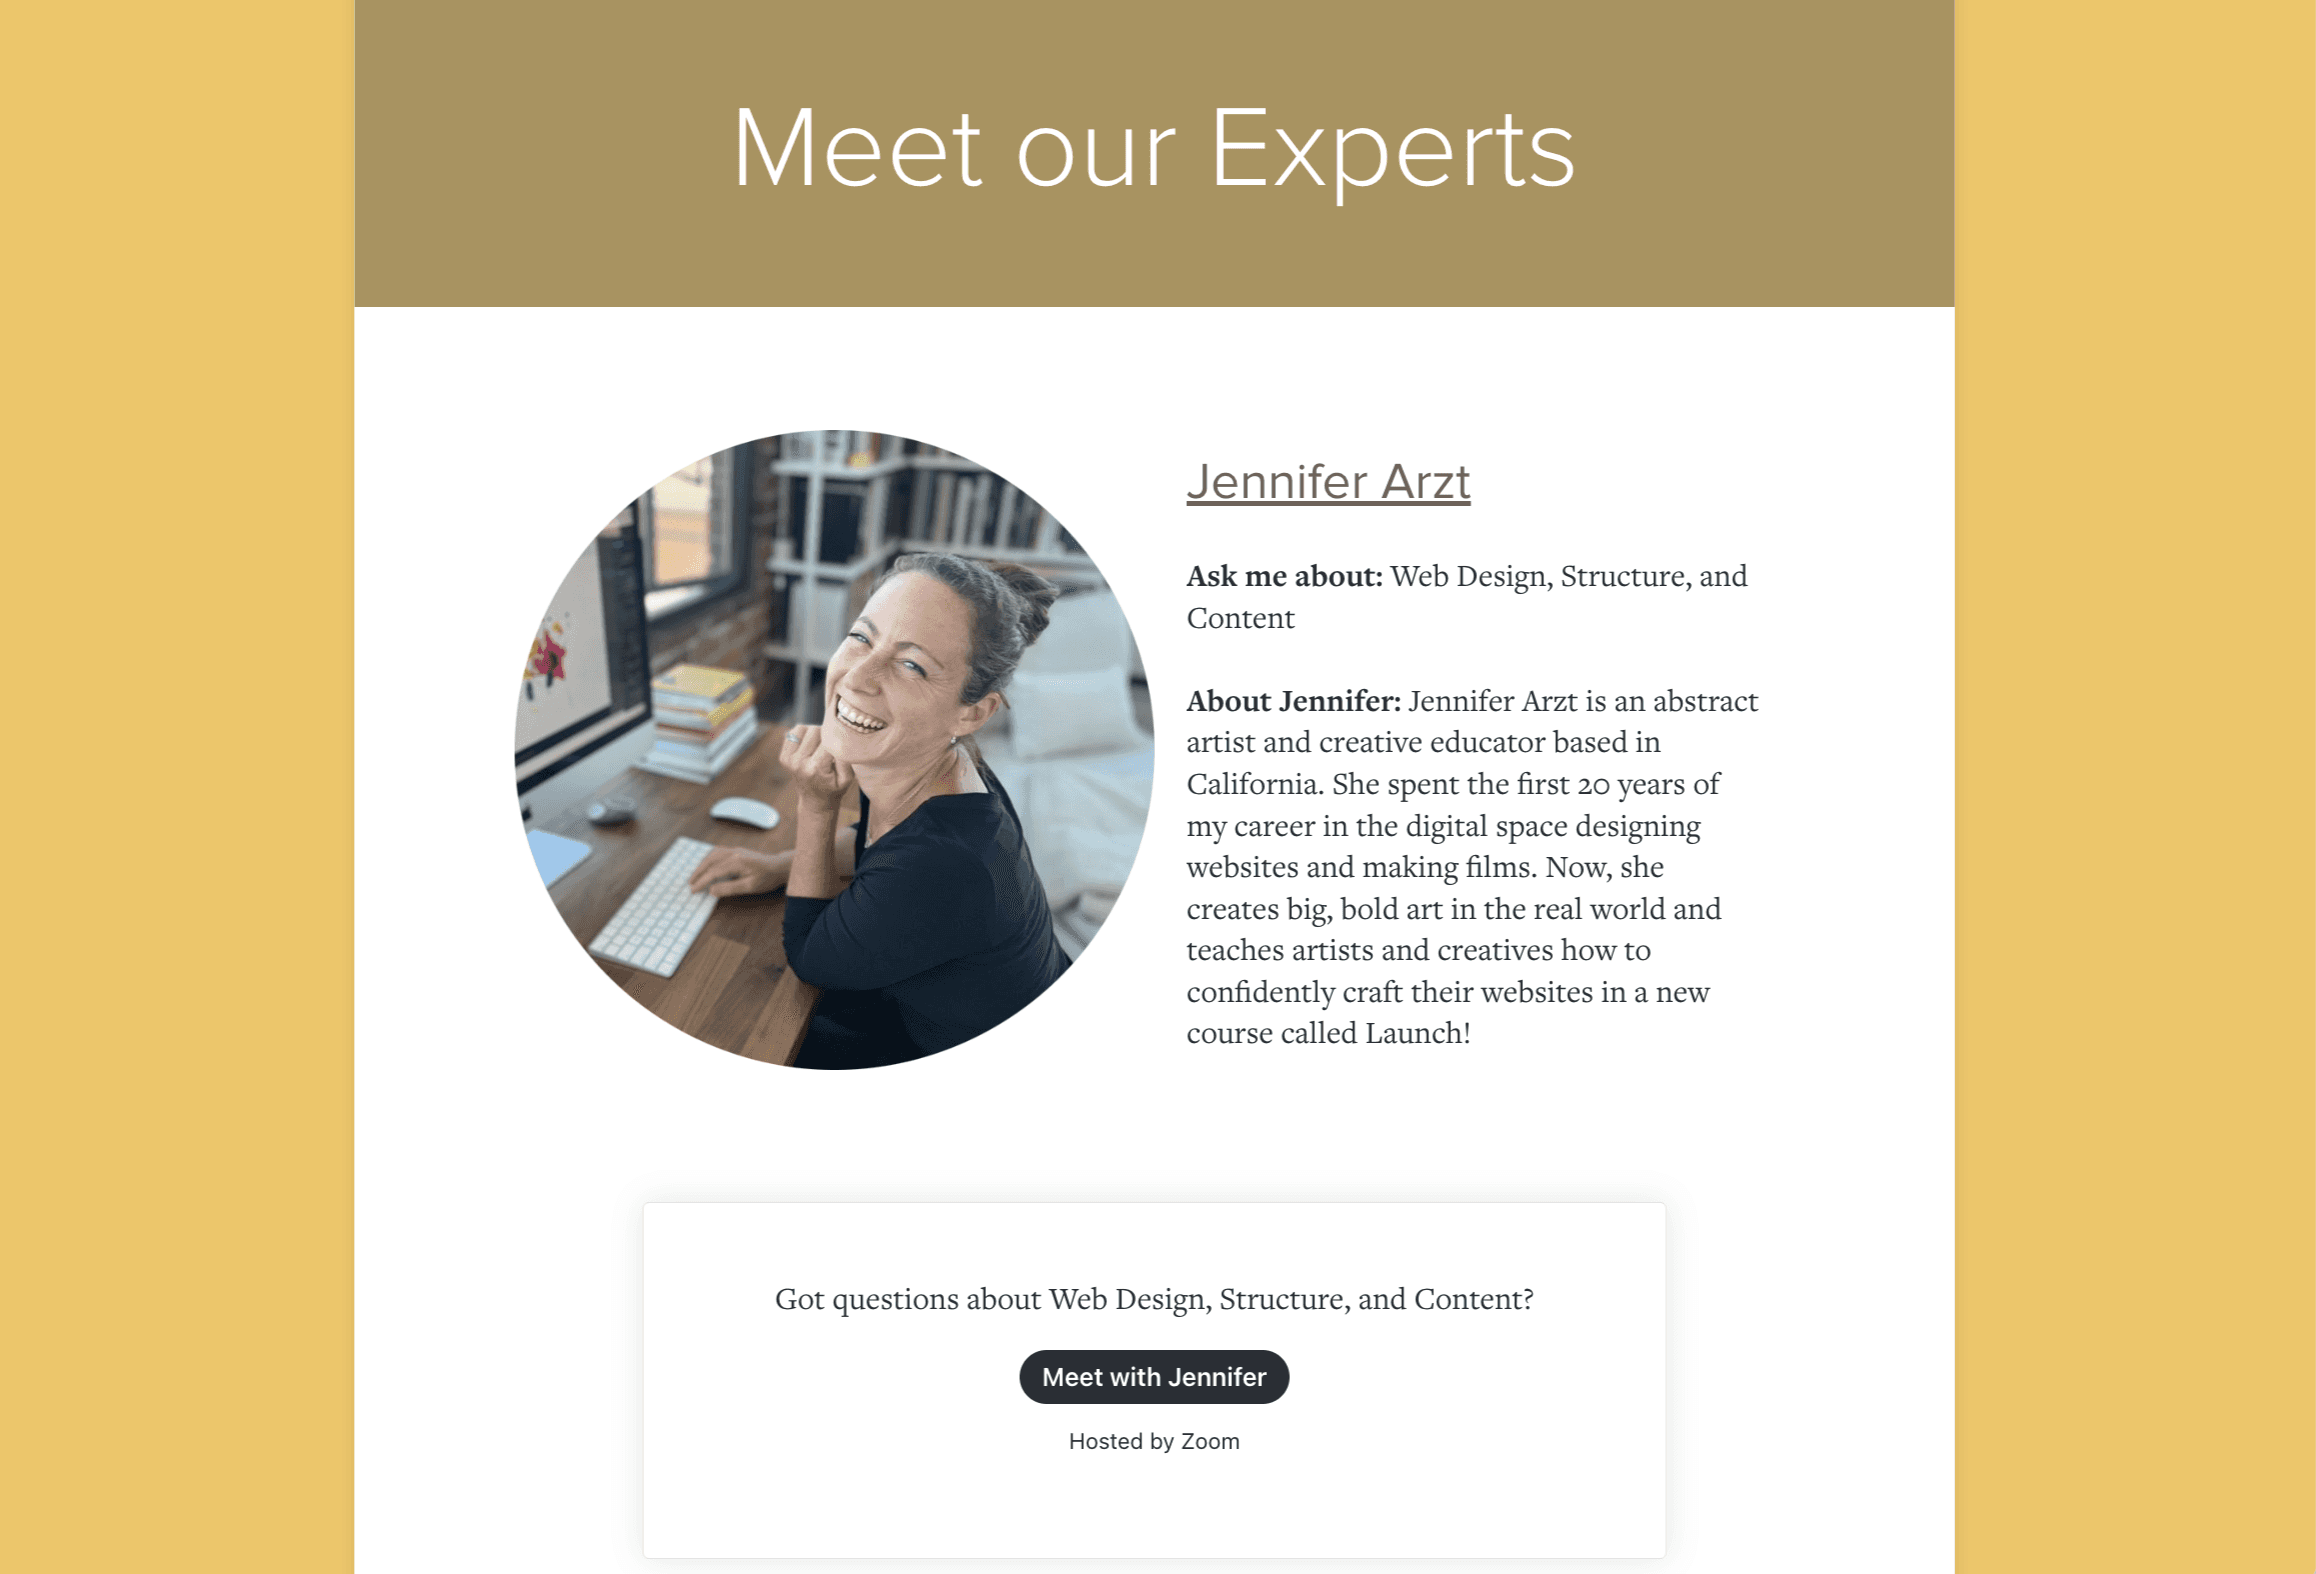
And when it does come time to choose a workshop or breakout session, you can send a link directly to this step in your video conferencing chat so attendees can make their selection easily.
Include resources and community right at hand
However, the Path as an event tool can do so much more than simply direct people to the right Zoom link. The Path provides opportunities for connection and engagement as well.
For instance, returning to the idea of community, the Path provides a chance for real time discussion in each session or follow-up discussion after.
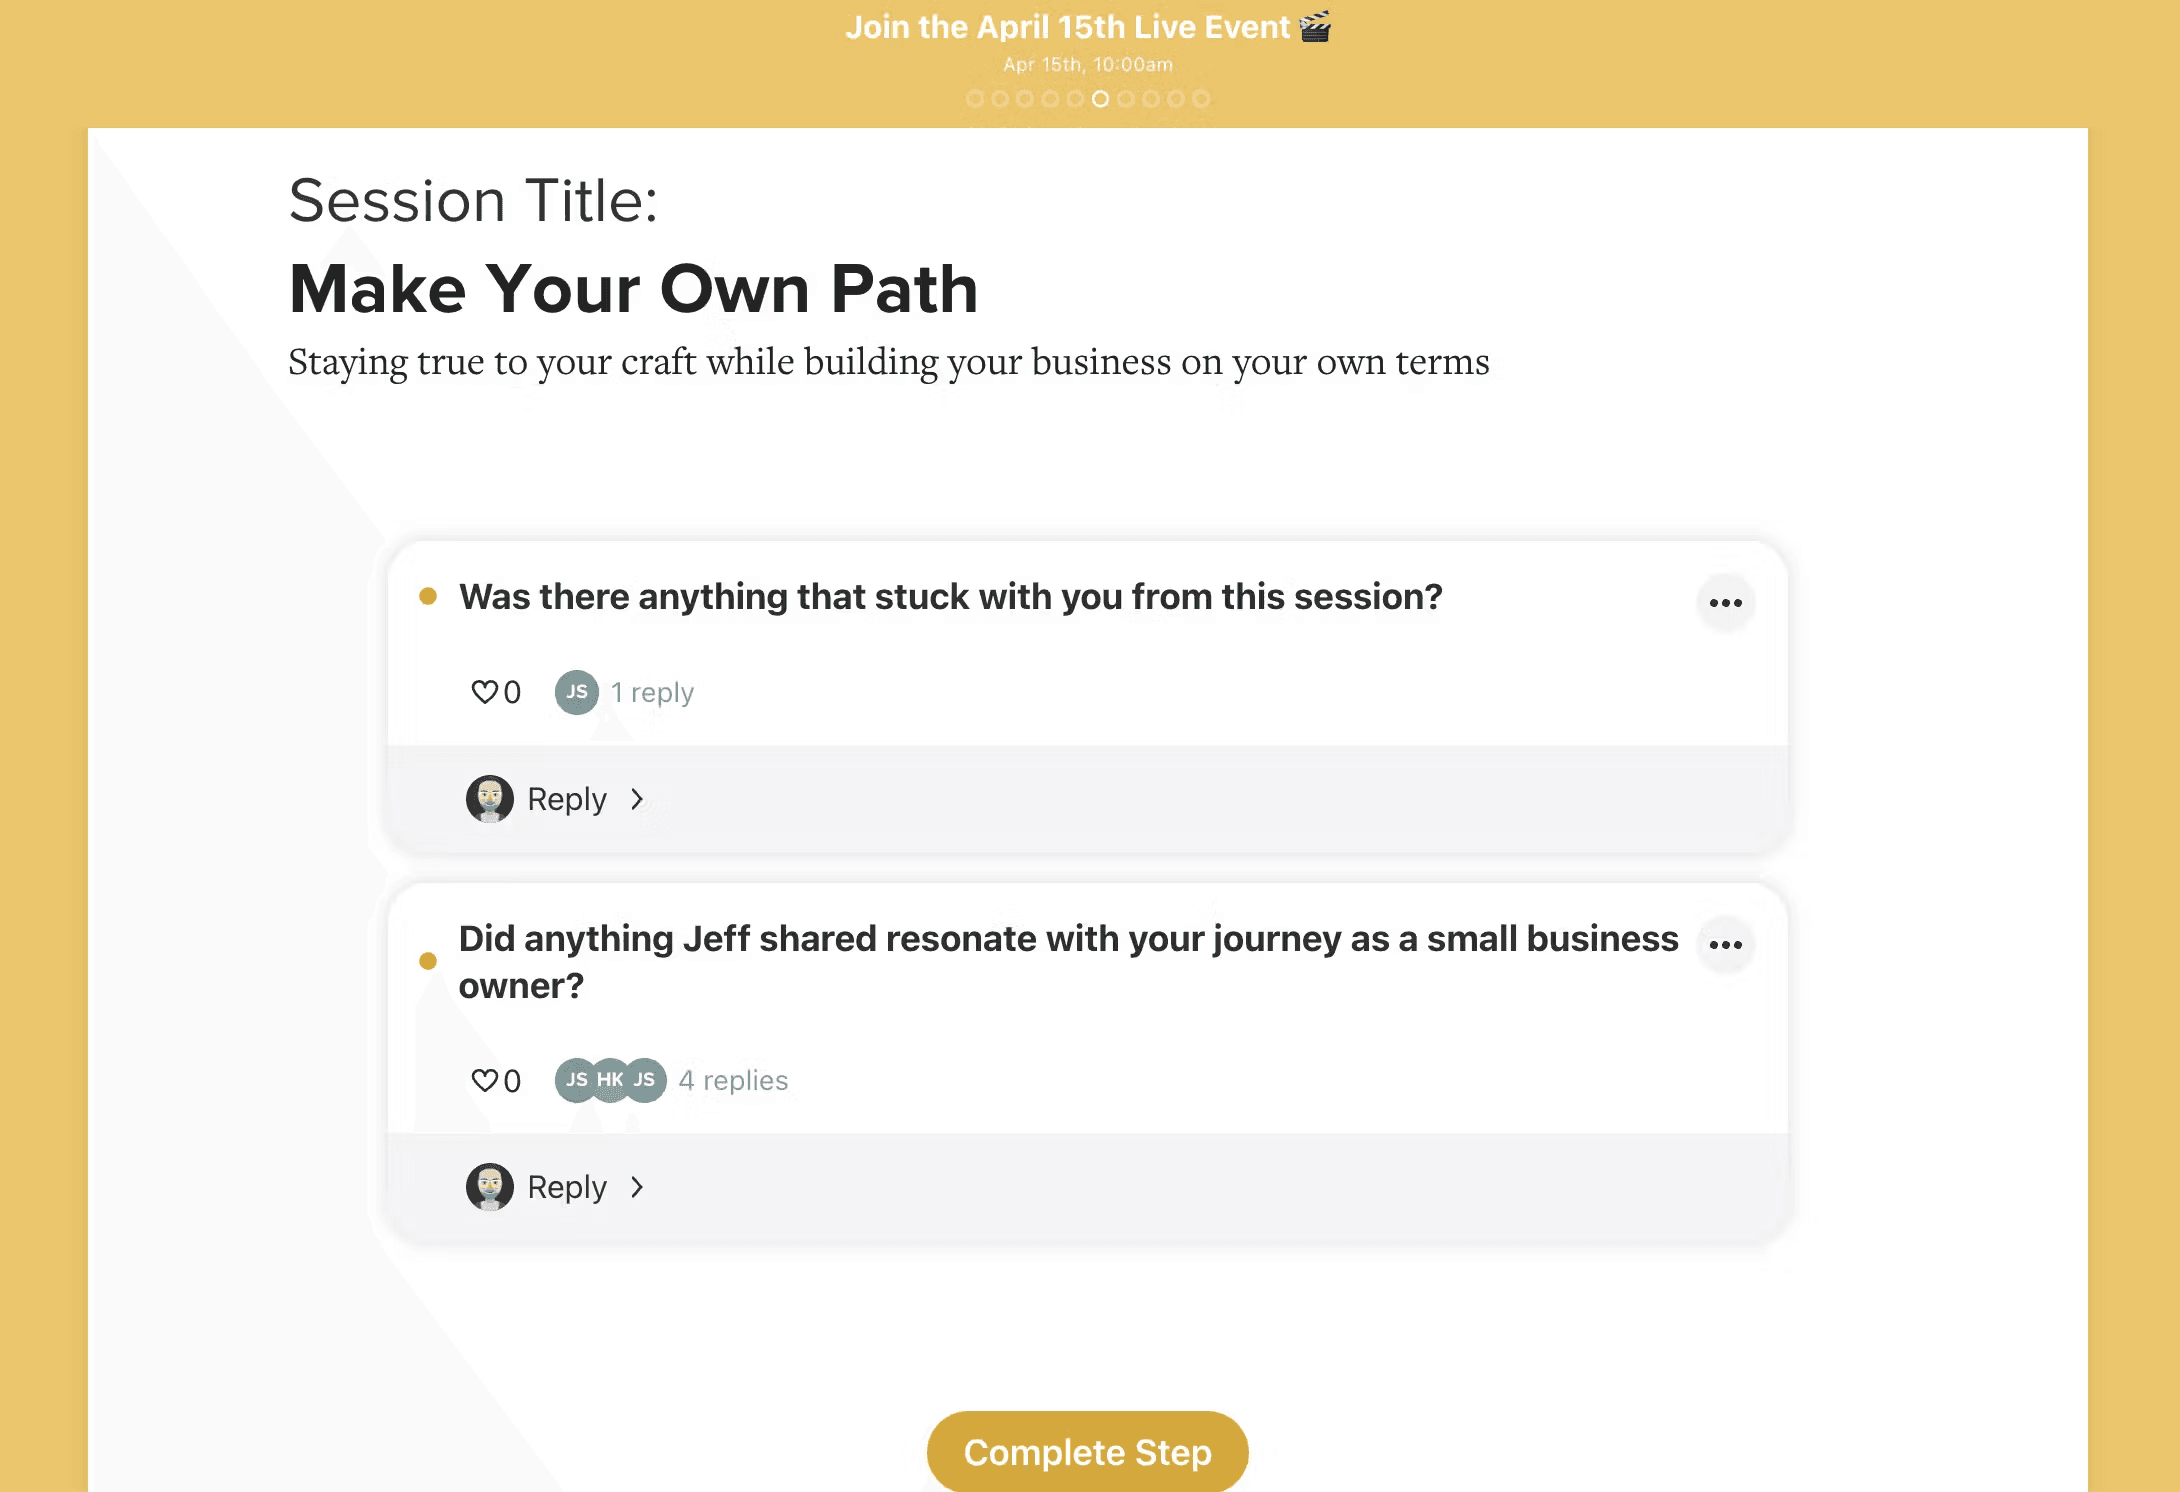
Each step is also an opportunity to include session-specific resources. While that approach didn’t quite fit The Makers Summit use case, we’ve seen Pathwright customers like Jeremy Caplan and Renee Hobbs do this frequently for live event paths and to great success.
The Makers Summit, however, did make full use of Pathwright’s content capture capabilities outside of sessions. Let’s discuss that next!
After the Event
Use the Path to collect bonus content
To help their attendees make the most of the amazing ideas and stories shared during their event, The Makers Summit aggregated content from across their speakers and beyond into an easy-to-scan “Bonus Content” lesson.
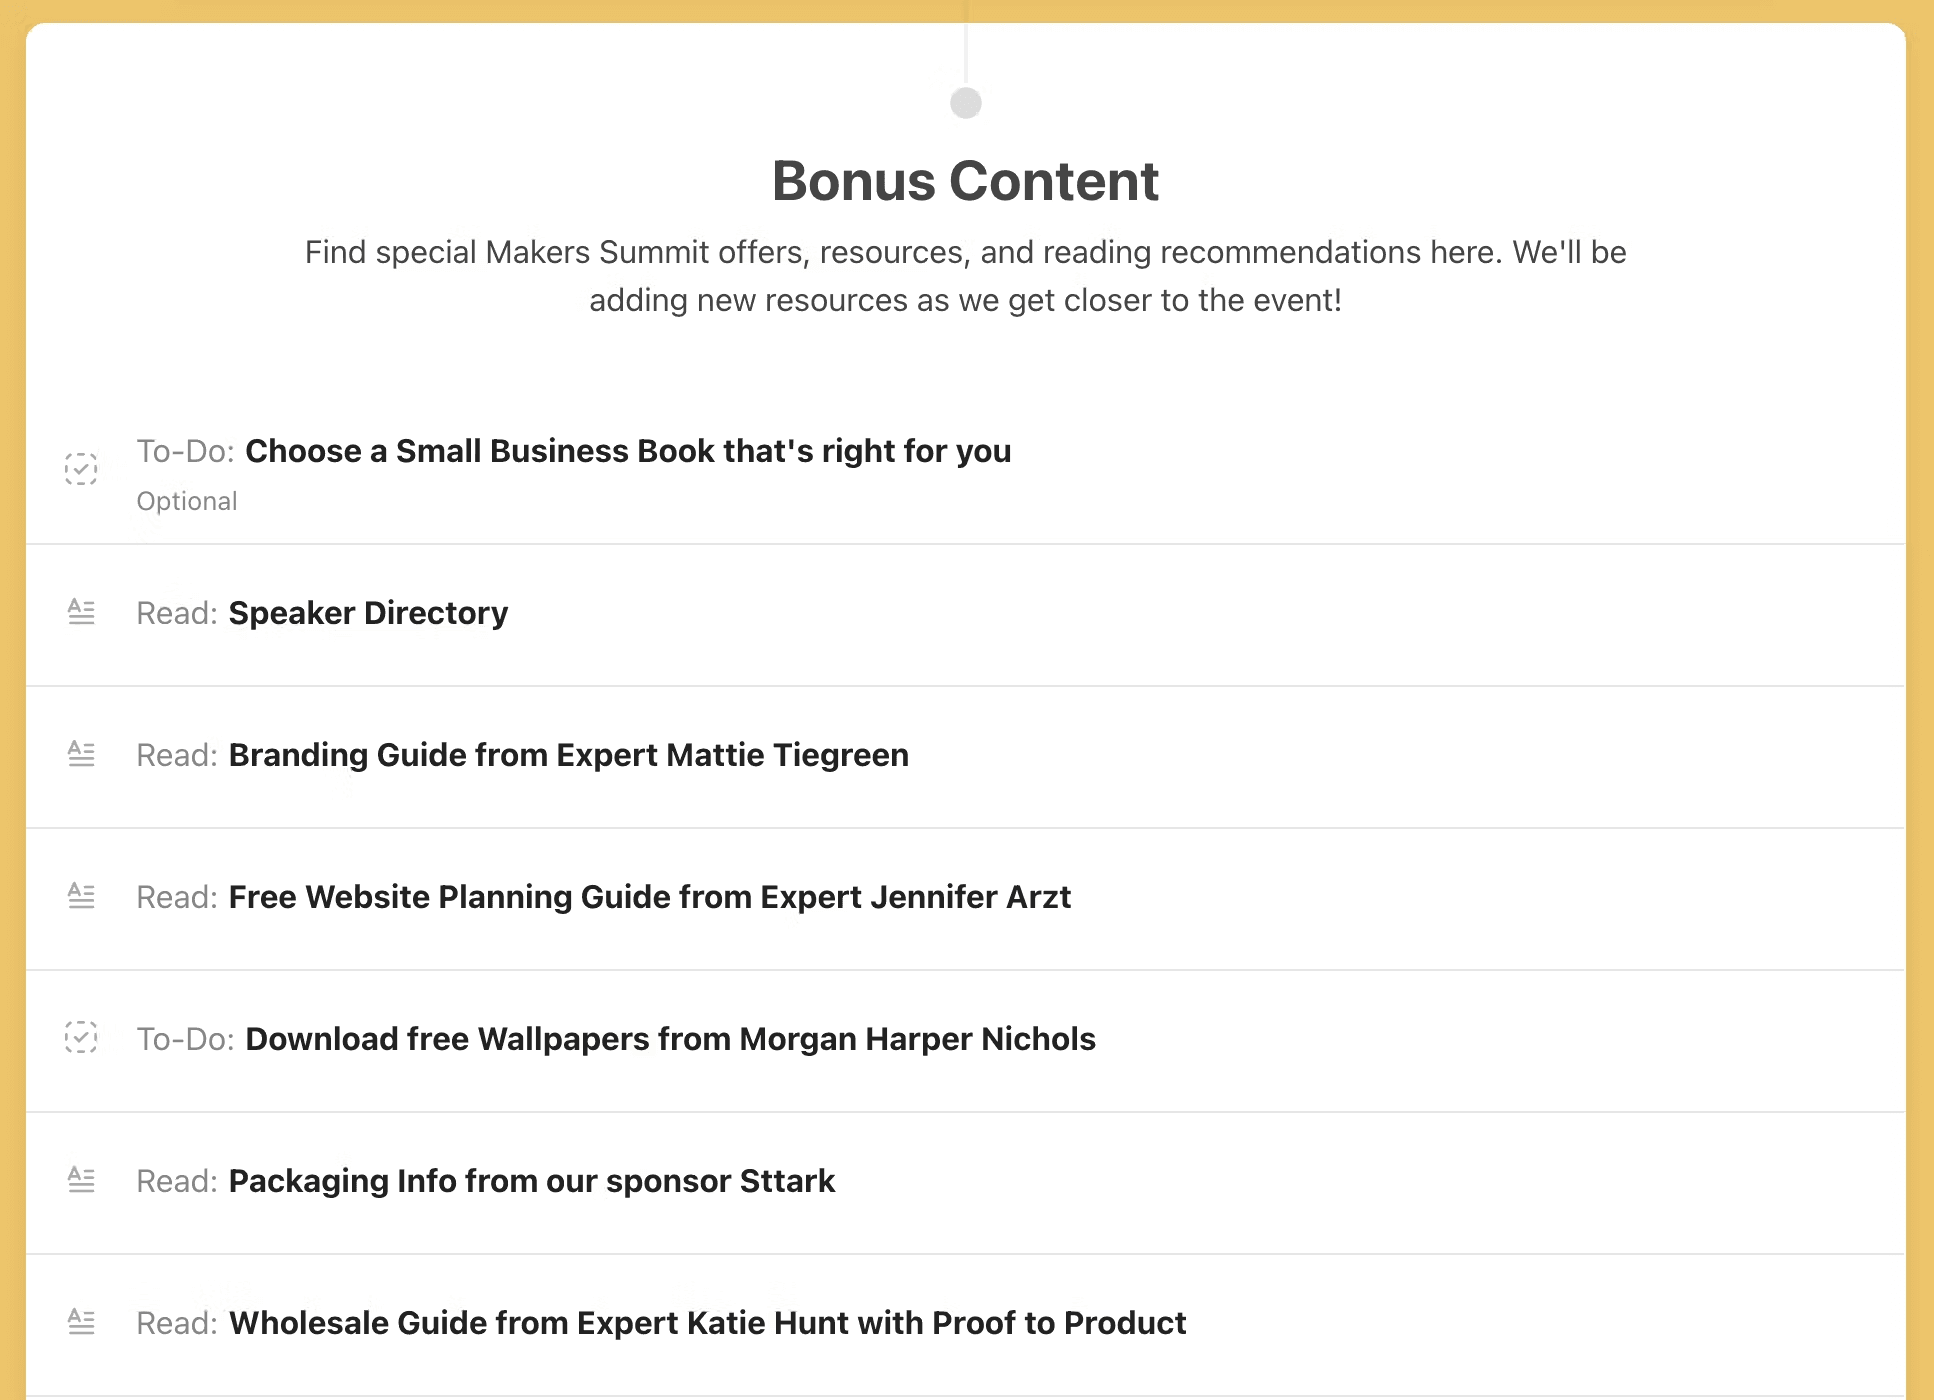
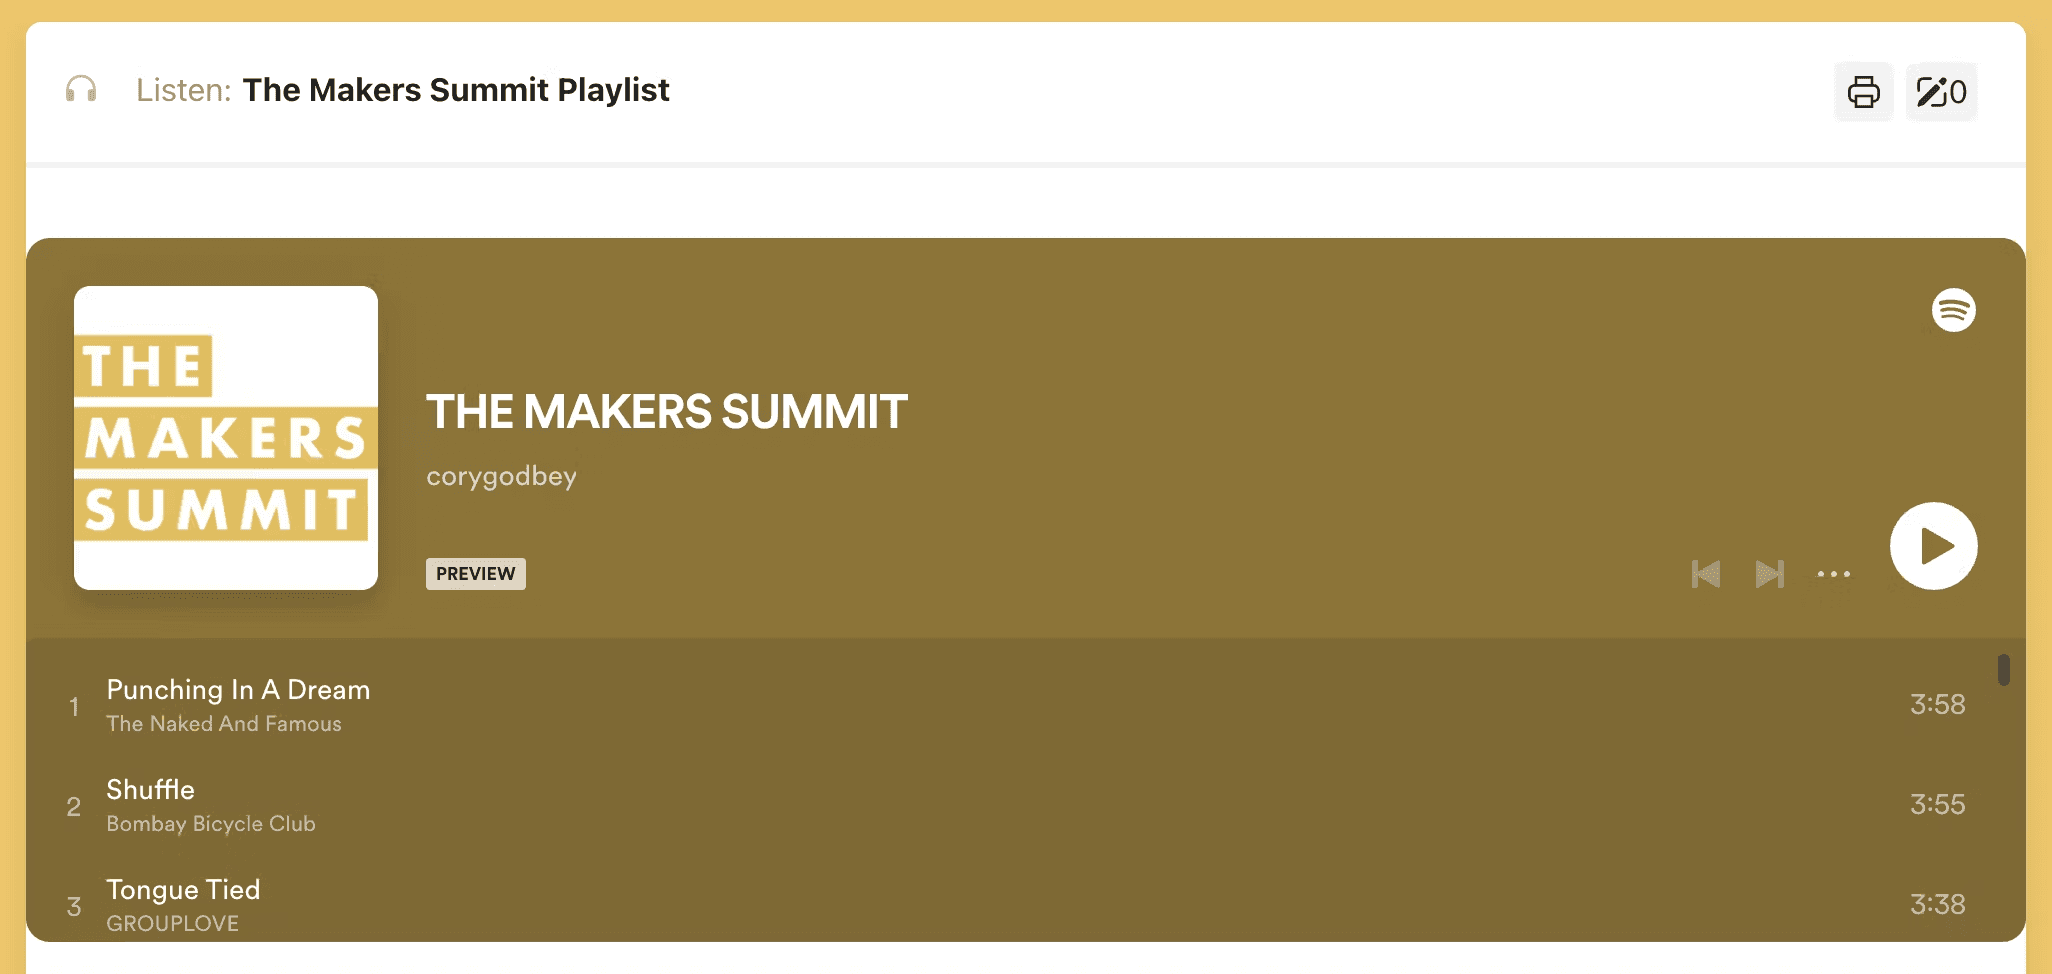
Each step in this lesson includes downloadable content that event attendees could take and put into action right away. This lesson also provided an opportunity for some fun. My favorite step of bonus content personally is this step that includes an embedded Spotify playlist of music makers can jam to when creating something new.
Survey your attendees
And to ensure they captured any actionable feedback from their attendees, The Makers Summit embedded a survey right in a step. This is a simple, effective way to get feedback easily without a lot of follow-up emails and reminder.
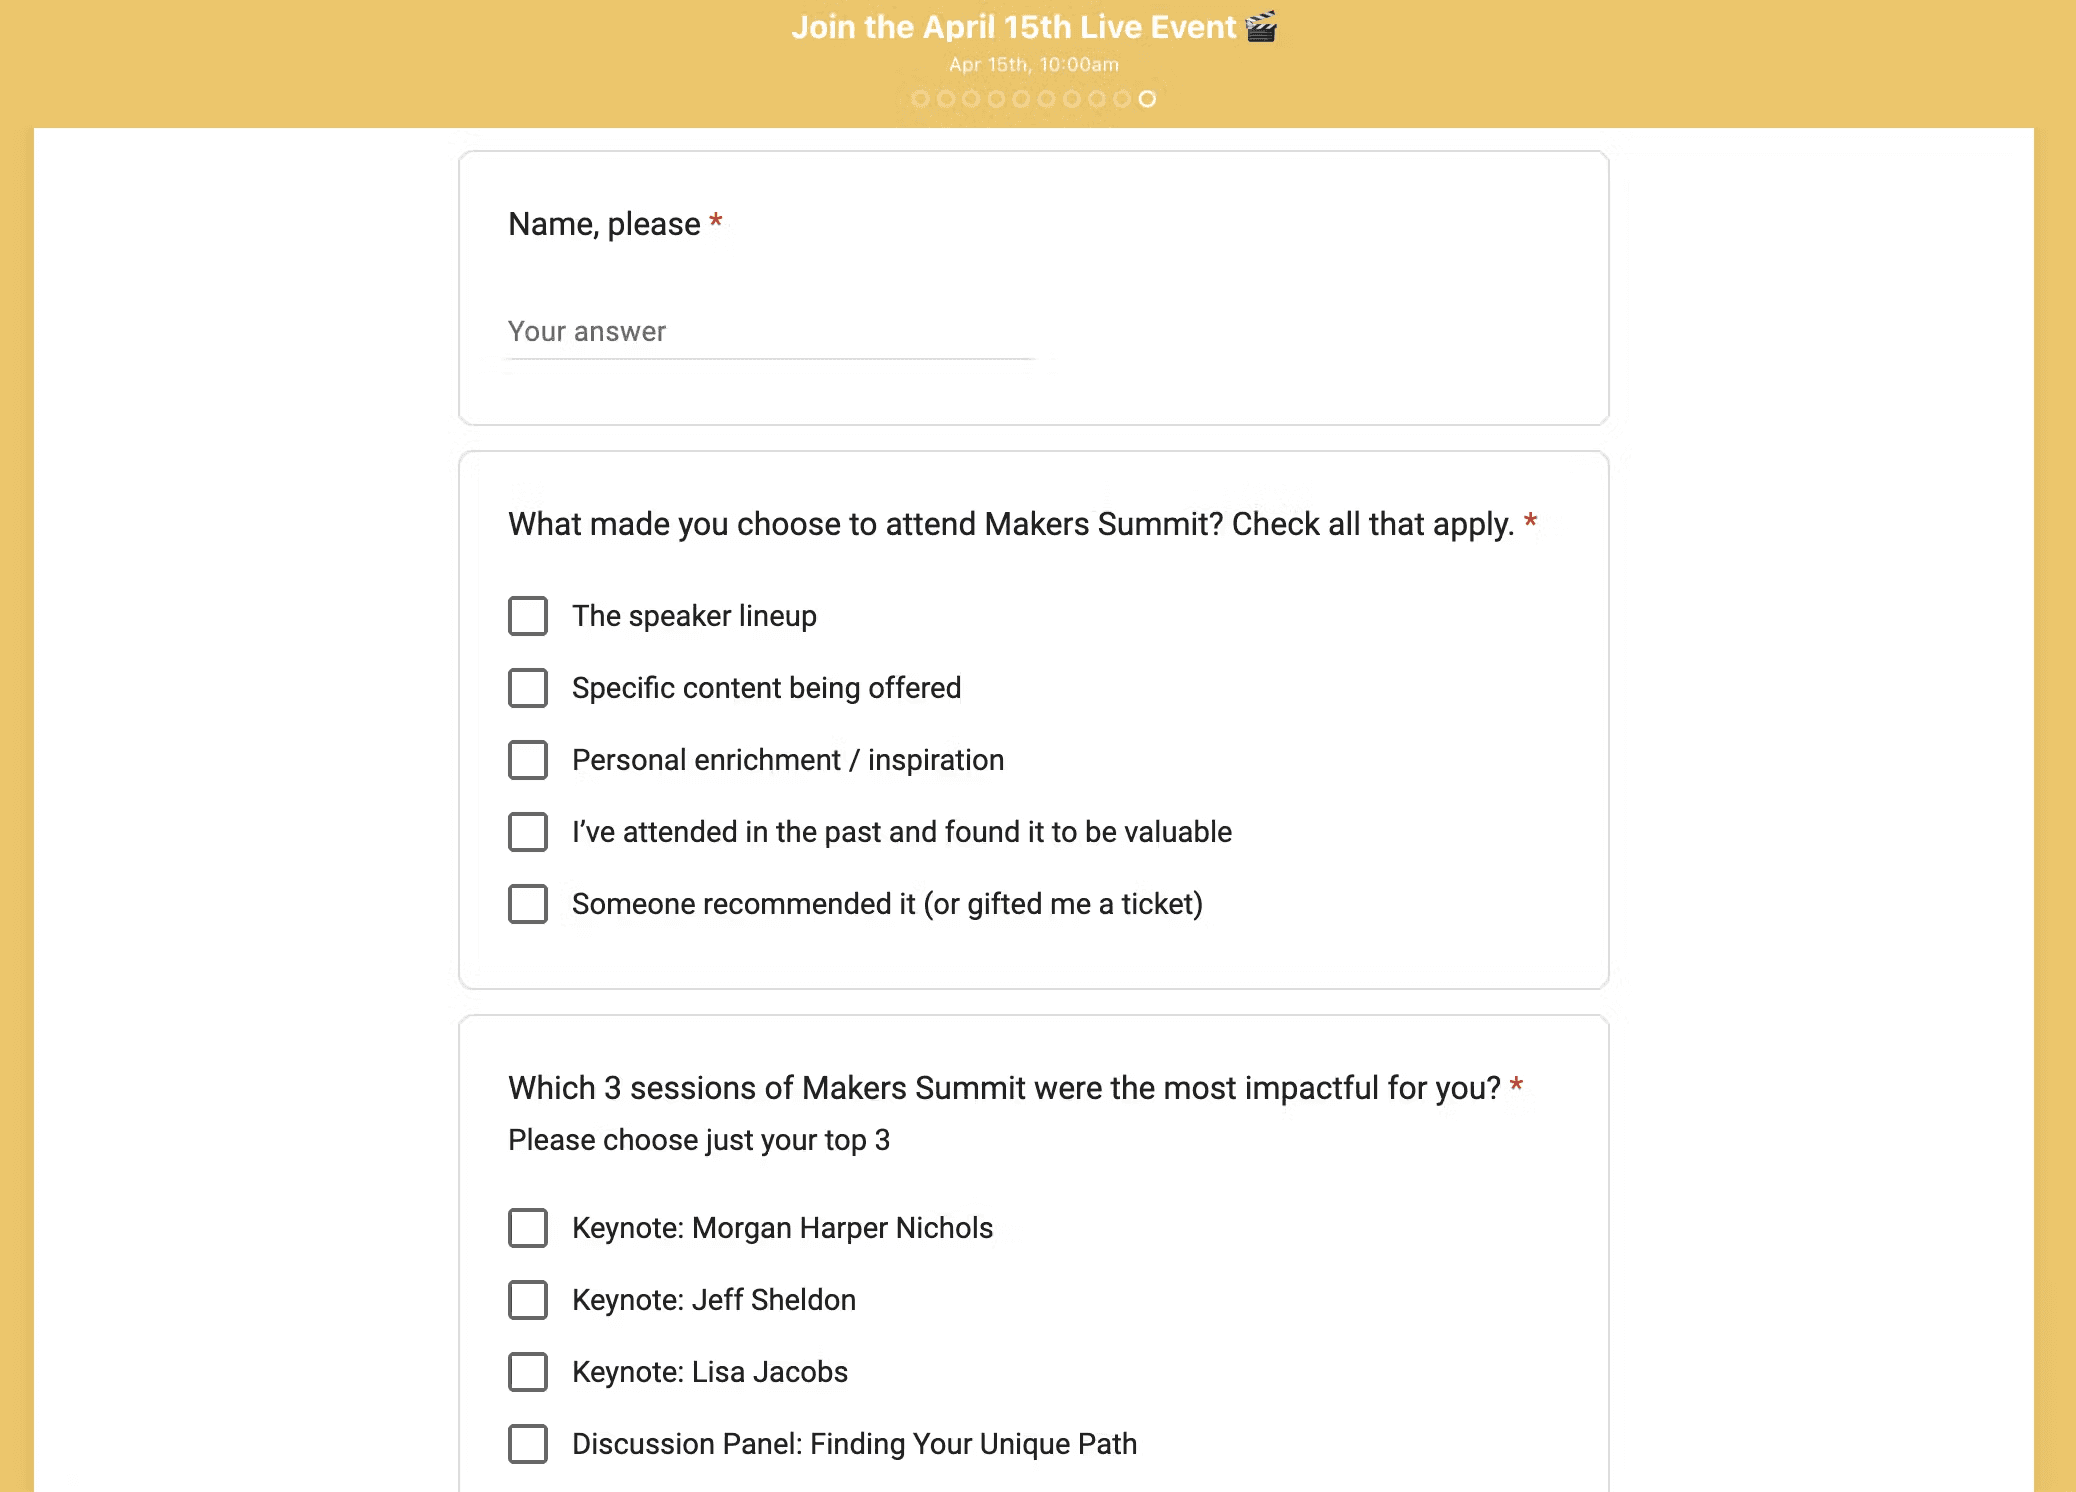
Our encouragement is to pre-write this survey before your event and have it ready to go at the end of your main event lesson.
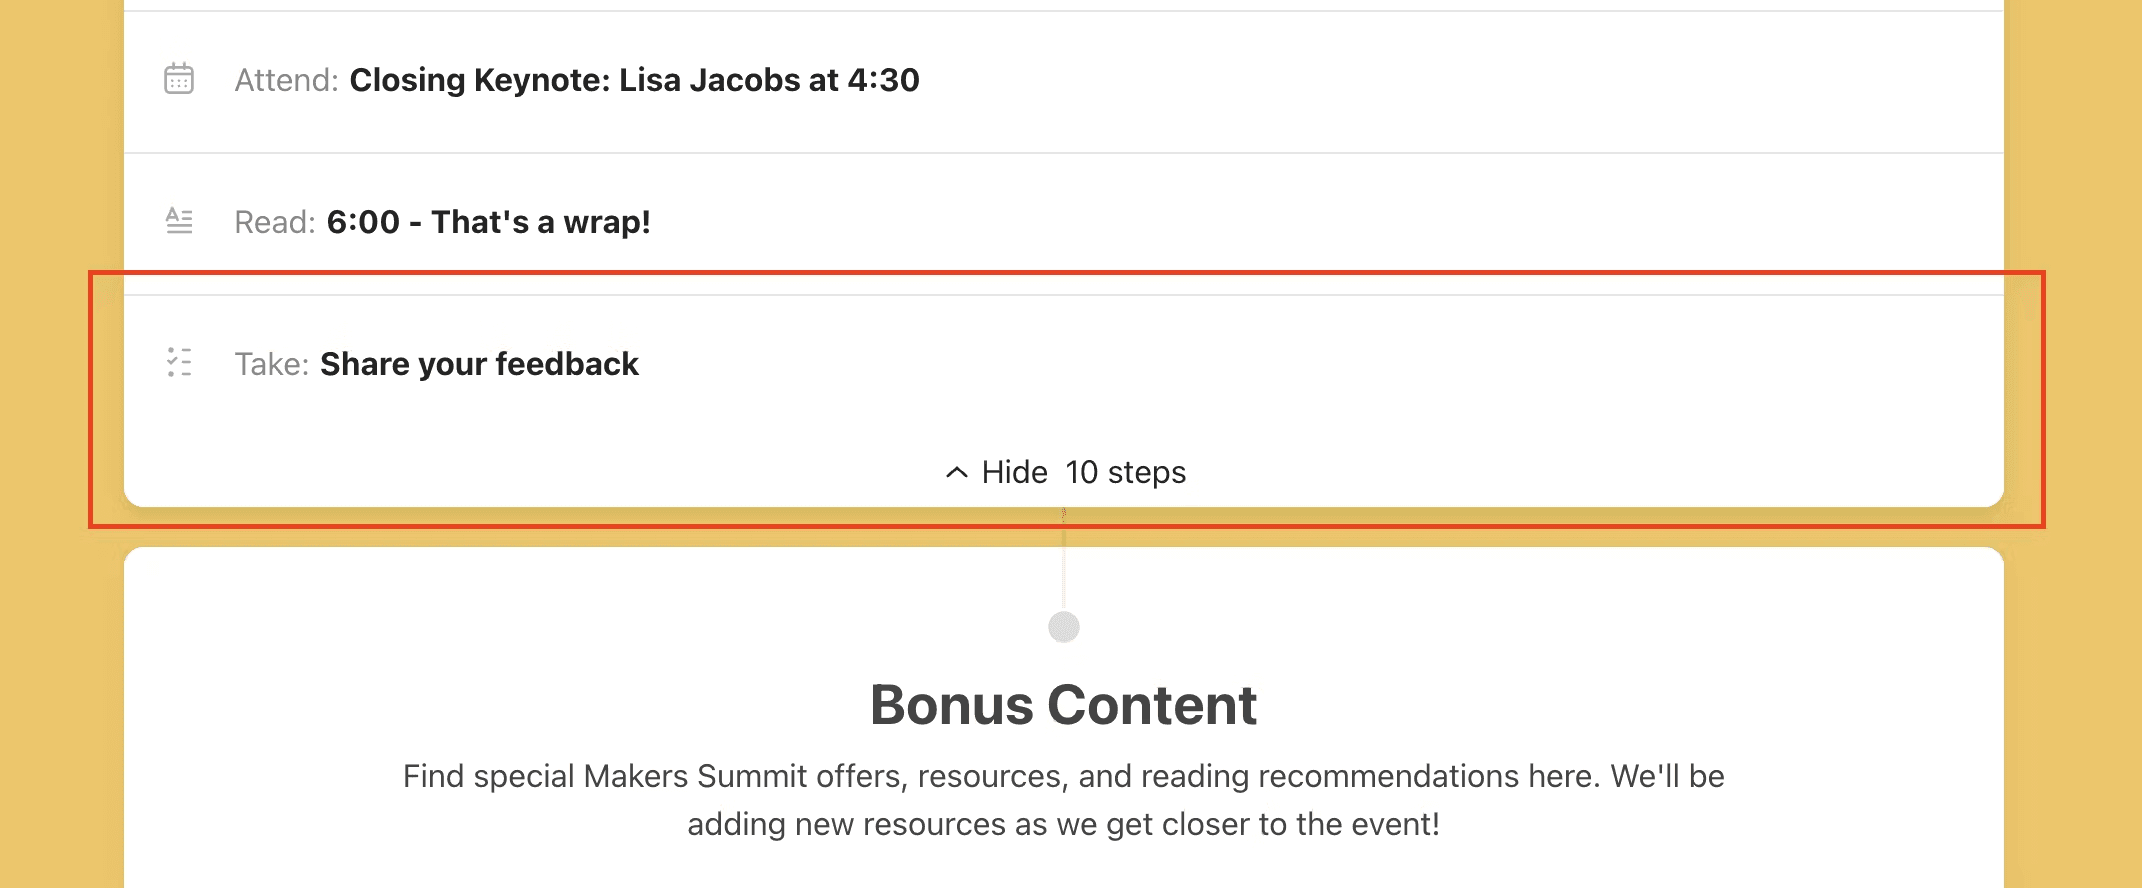
During your closing remarks, you can easily link directly to this step so your learners can offer feedback while their memory is sharp and their excitement is high.
Post recordings
Perhaps one of the greatest benefits of the Path as a live, virtual event tool is in providing access to session recordings. Instead of hosting these videos on a private website and requiring a password for attendees to rewatch, you can easily upload videos to the path where your learners already have access.
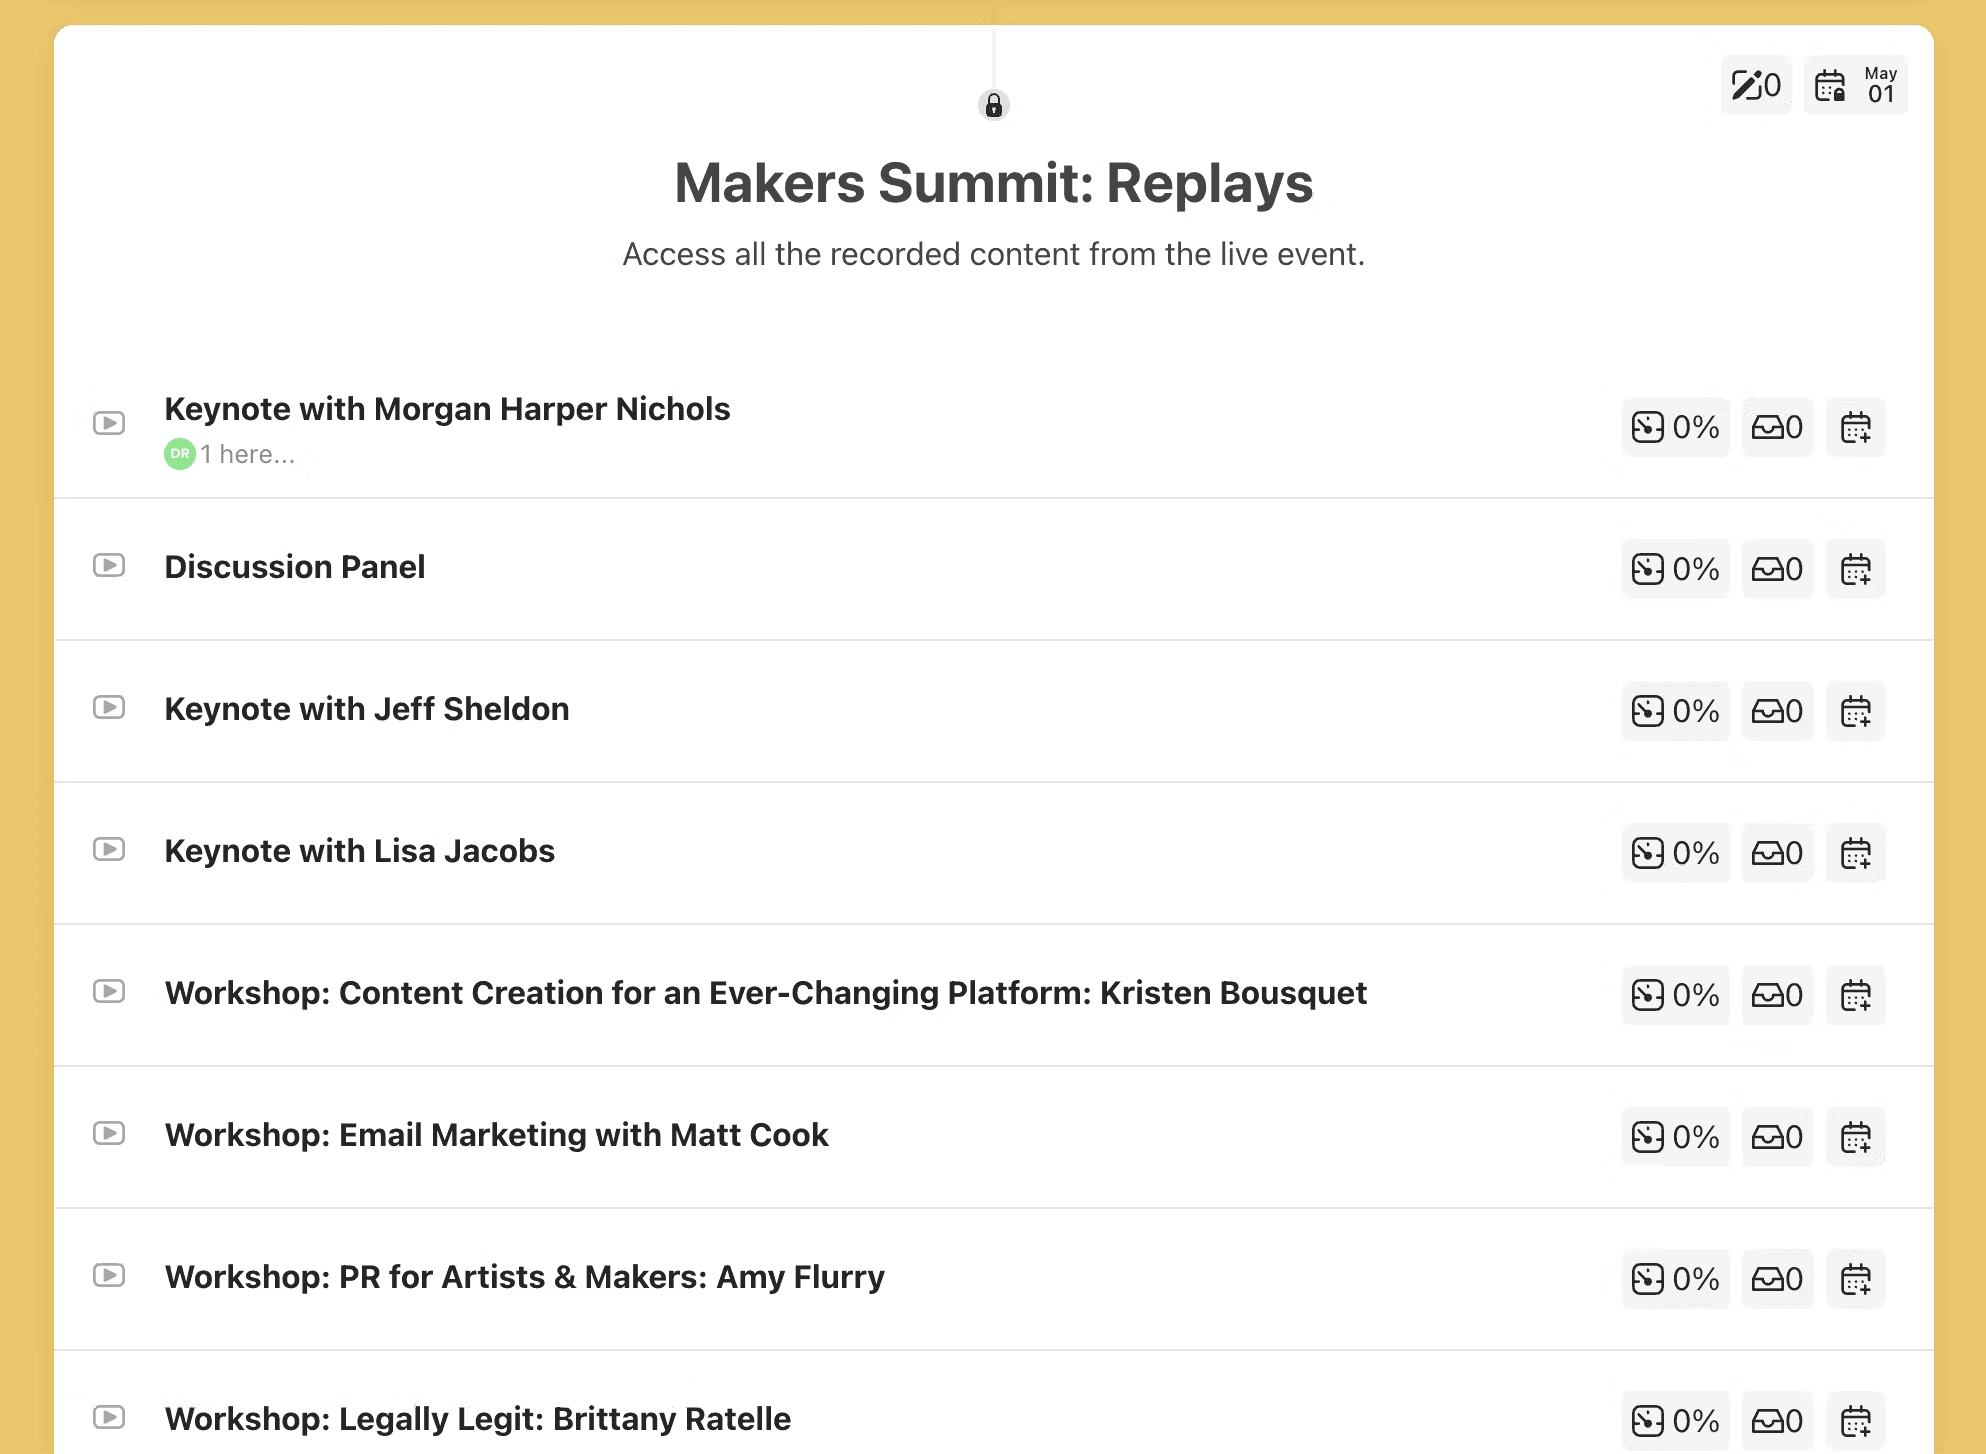
While there are a number of ways to implement this idea, it does provide another opportunity for learners to connect through further discussion or to provide more session specific material if you choose.
Once your session recordings are ready, upload them to the Path and send out a reminder to your attendees that they’re ready to relive your amazing virtual event.
Conclusion
We’re always excited when creative, thoughtful educators like the folks at The Makers Summit find new ways to use Pathwright. We hope you’ll follow their lead and try your hand at the same this summer.
If you do, remember that Pathwright is a flexible design tool that’s able to mold to all kinds of learning situations. Focus on the principles of what we discussed above rather than viewing them as hard and fast rules that must be followed. And if you’d like to discuss how Pathwright might be used for your particular event, why not reach out to Michelle for a conversation?
As always, happy Path making, no matter what kind of Path that may be.
Our team can help you tackle LXD projects of any size. Learn more about our approach
Further Reading
